Showing posts with label Recipe. Show all posts

Friday, 25 January 2013

Super Brunch Sunday: Cinnamon Buns


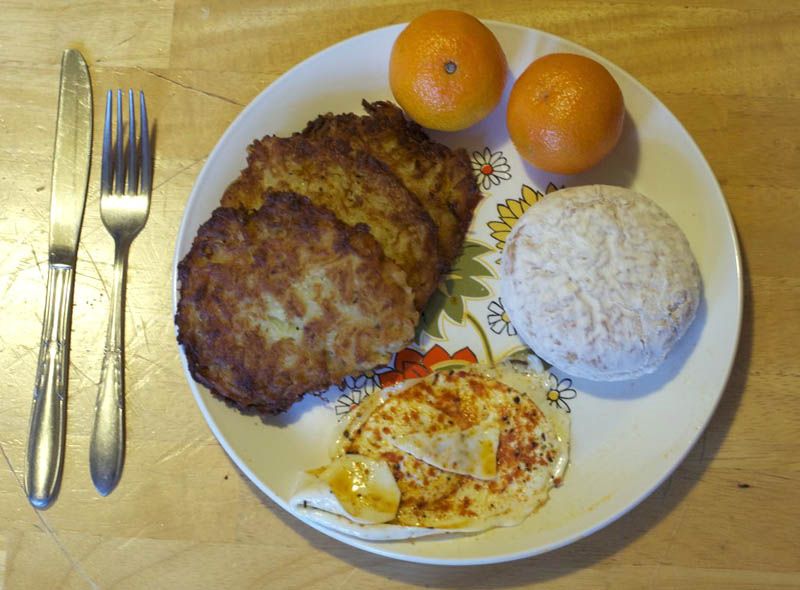
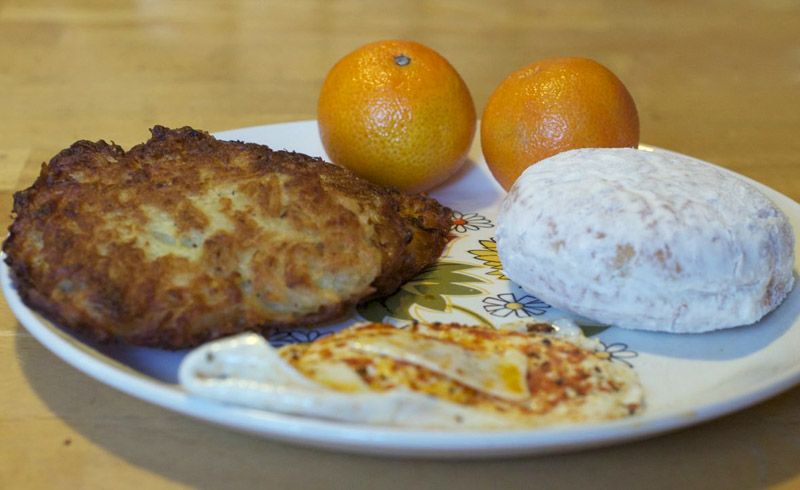
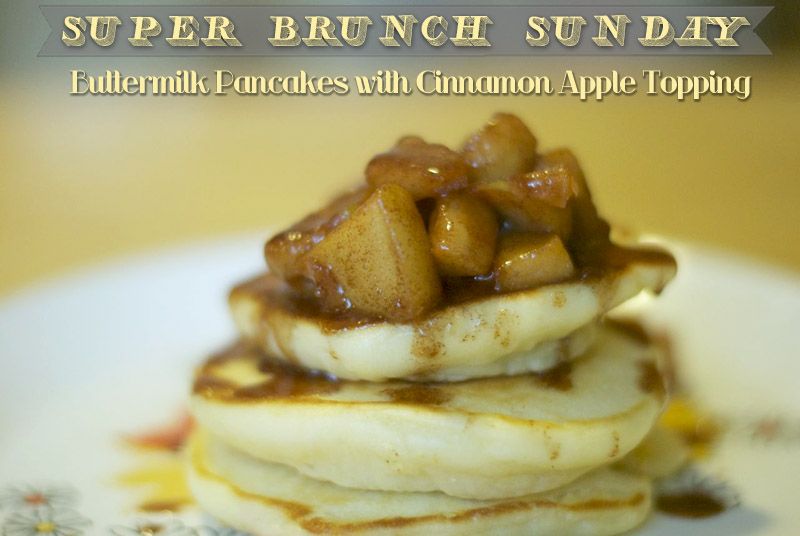
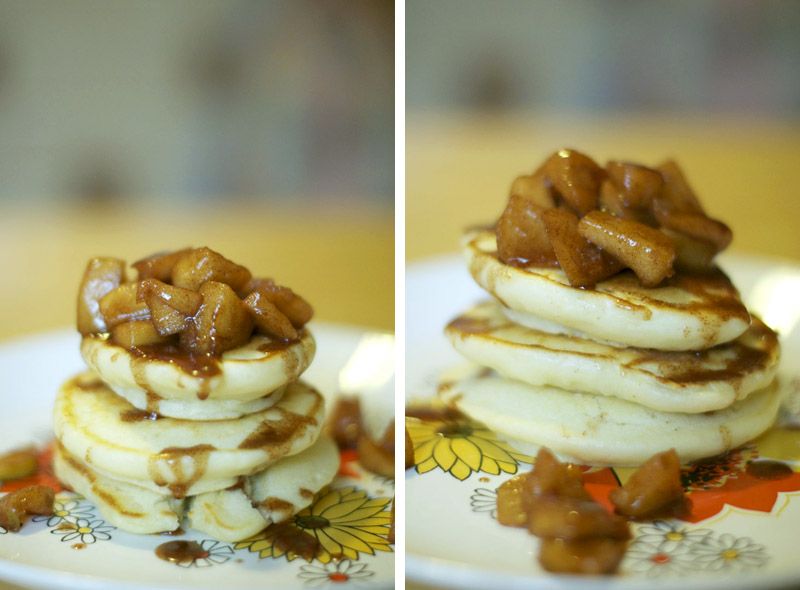
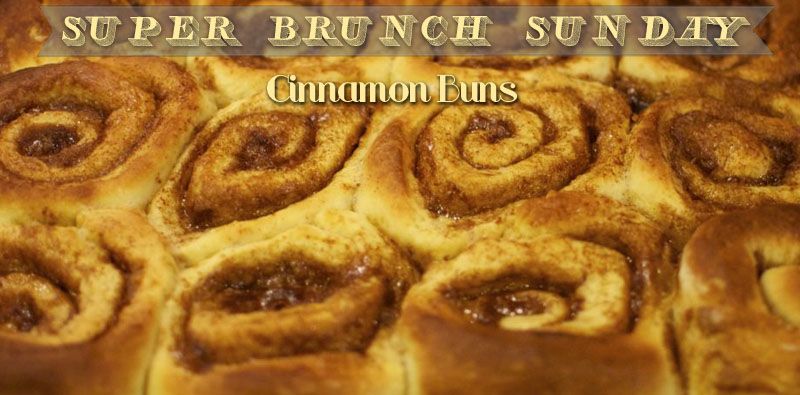
I am a big fan of sweet breakfasts, if you couldn't tell from the Super Brunch Sunday recipes posted thus far!  What can I say, I have a sweet tooth that just won't quit.    I have always been a big fan of cinnamon buns, but after Saint Cinnamon disappeared from my local malls (my step-mom could always get me to be patient as a kid while she ran errands or shopped for gifts at the mall with the promise of a pecan cinnamon bun) I gave up eating them unless I was "baking" some Pillsbury ones.  I know this will make me mighty unpopular, but I do not care for Cinnabon.  And friends, after you try your hand at these overnight cinnamon rolls, you are breaking up with Cinnabon too.  Because after you eat these, you are never going to want to buy a bun that's been sitting under a heat lamp for hours, ever ever again.  I am freeing you from the shackles of mass produced cinnamon rolls.  Freedom ain't never tasted so, so sweet.

I was inspired to try my hand making cinnamon buns after I read Emma's post on A Beautiful Mess about how she loves to make cinnamon buns for Christmas morning.  I've put this baking adventure off for some time, because I was scared to make my own dough, and I had never worked with yeast before.  Well, I do learn best by doing, so in celebration of my friend Jamie's birthday (the very man who inspired Super Brunch Sundays!!), I bit the bullet and baked up a batch of these babies. 
Cinnamon Buns (recipe by Alton Brown, with my notes added)

Ingredients

Dough:

  • 4 large egg yolks, room temperature
  • 1 large whole egg, room temperature
  • 2 ounces sugar, approximately 1/4 cup
  • 3 ounces unsalted butter, melted, approximately 6 tablespoons
  • 6 ounces buttermilk, room temperature
  • 20 ounces all-purpose flour, approximately 4 cups, plus additional for dusting
  • 1 package instant dry yeast, approximately 2 1/4 teaspoons
  • 1 1/4 teaspoons kosher salt
  • Vegetable oil or cooking spray

Filling:

  • 8 ounces light brown sugar, approximately 1 cup packed
  • 1 tablespoon ground cinnamon
  • Pinch salt
  • 3/4-ounce unsalted butter, melted, approximately 1 1/2 tablespoons

Icing:

  • 2 1/2 ounces cream cheese, softened, approximately 1/4 cup
  • 3 tablespoons milk
  • 5 1/2 ounces powdered sugar, approximately 1 1/2 cups

Method

In the bowl of a stand mixer with the whisk attachment, whisk the egg yolks, whole egg, sugar, butter, and buttermilk. Add approximately 2 cups of the flour along with the yeast and salt; whisk until moistened and combined. Remove the whisk attachment and replace with a dough hook. Add all but 3/4 cup of the remaining flour and knead on low speed for 5 minutes. Check the consistency of the dough, add more flour if necessary; the dough should feel soft and moist but not sticky. Knead on low speed 5 minutes more or until the dough clears the sides of the bowl. Turn the dough out onto a lightly floured work surface; knead by hand about 30 seconds. Lightly oil a large bowl. Transfer the dough to the bowl, lightly oil the top of the dough, cover and let double in volume, 2 to 2 1/2 hours.   

Seriously, just go watch a movie and let the yeast work some magic.

Combine the brown sugar, cinnamon and salt in a medium bowl. Mix until well incorporated. Set aside until ready to use.
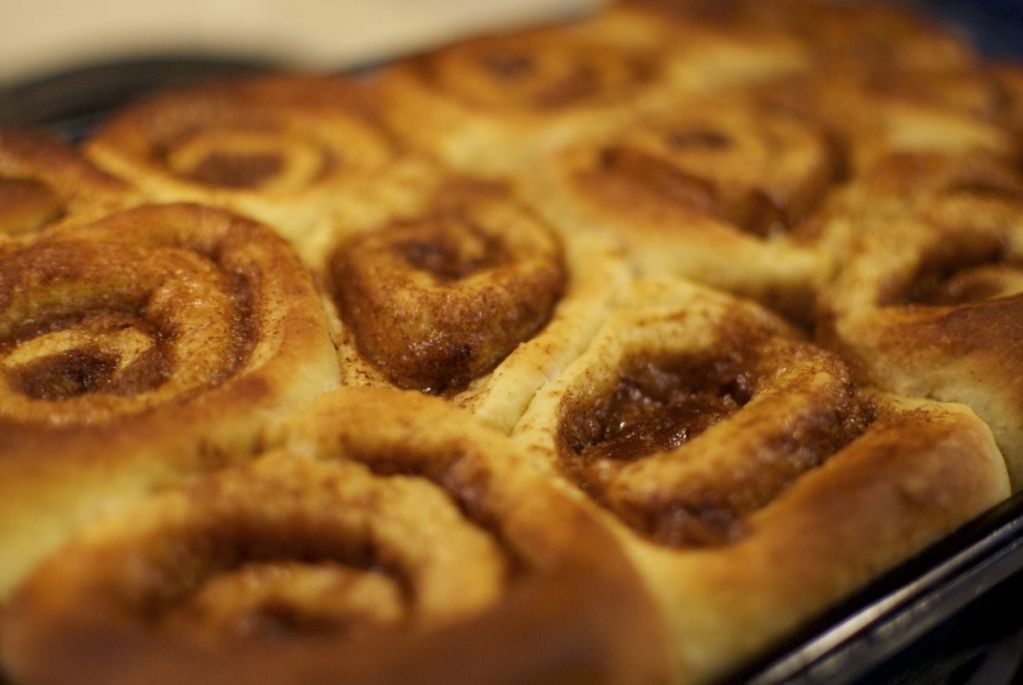
Butter a 9 by 13-inch glass baking dish. Turn the dough out onto a lightly floured work surface. Gently shape the dough into a rectangle with the long side nearest you. Roll into an 18 by 12-inch rectangle. Brush the dough with the 3/4-ounce of melted butter, leaving 1/2-inch border along the top edge. Sprinkle the filling mixture over the dough, leaving a 3/4-inch border along the top edge; gently press the filling into the dough. Beginning with the long edge nearest you, roll the dough into a tight cylinder. Firmly pinch the seam to seal and roll the cylinder seam side down. Very gently squeeze the cylinder to create even thickness. Using a serrated knife, slice the cylinder into 1 1/2-inch rolls; yielding 12 rolls. Arrange rolls cut side down in the baking dish; cover tightly with plastic wrap and store in the refrigerator overnight or up to 16 hours.

 Sleep on it.  It'll be delish in the morning.

Remove the rolls from the refrigerator and place in an oven that is turned off. Fill a shallow pan 2/3-full of boiling water and set on the rack below the rolls. Close the oven door and let the rolls rise until they look slightly puffy; approximately 30 minutes. Remove the rolls and the shallow pan of water from the oven.
Preheat the oven to 350 degrees F.
When the oven is ready, place the rolls on the middle rack and bake until golden brown, or until the internal temperature reaches 190 degrees F on an instant-read thermometer, approximately 30 minutes.
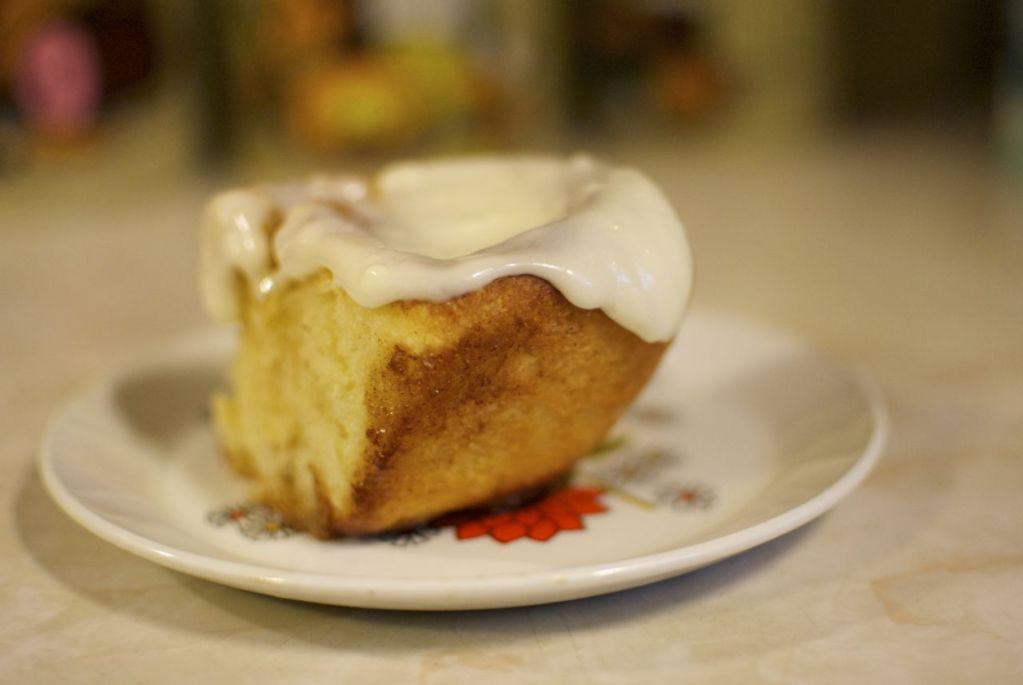
While the rolls are cooling slightly, make the icing by whisking the cream cheese in the bowl of a stand mixer until creamy. Add the milk and whisk until combined. Sift in the powdered sugar, and whisk until smooth. Spread over the rolls and serve immediately.

Yields 12 rolls. 

Notes from the editor (aka me):
Next time, I won't even bother using my stand mixer for this.  The dough was VERY sticky, and I had to fight it off with a spatula when it tried to envelop the entirety of my mixer.  Not fun.  After my "The Blob" moment, I opted to mix with a whisk and a wooden spoon, and kneaded entirely by hand. 
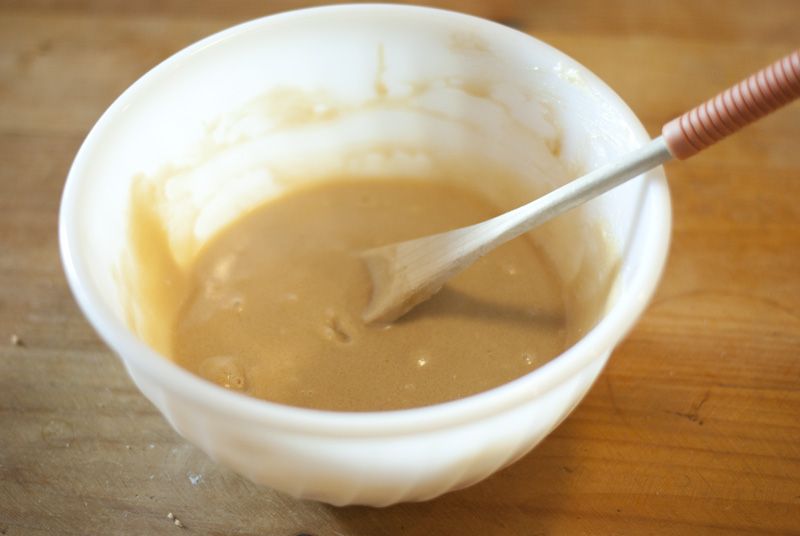
When it came to the icing, I went a little more free form and added milk and sugar until I got a consistency that I liked.  This recipe makes a very generous quantity of icing!! 
Next time I make these, I am also going to roll them across the wide end, and make 6-8 larger rolls instead of 12 smaller ones.  Because who am I kidding, I'm not only going to eat one of the small ones.

So, what are you making for brunch this Sunday?
--Erin

Friday, 4 January 2013

Super Brunch Sunday: Latkes


I know, I'm a couple weeks late on this one, Channukah is already over! Well, though I made these to enjoy on the last day of Channukah, I firmly believe that no occasion is required to enjoy some latkes.  They're like the bigger, better older brother of hash browns, and that means that they go perfectly with eggs (and donuts) for breakfast any time! Donuts and latkes, you say?? Well, they're both Channukah foods, because they're both fried in oil, and jelly filled donuts are preferred because the raspberry filling signifies the blood of the Greeks slain by the Maccabees.  I just made that last part up.  Jelly donuts ARE a Channukah thing though.  But let's get back to the point, which is that fried foods are amazing any time of year!

This was my first time making latkes from scratch that I really loved. I have made a stab at these delicious fried pucks of potato before and wasn't thrilled.  It seems to me that my previous mistakes were: 1. I didn't soak the potatoes in really really cold water to separate the starch for long enough, and 2. these need a lot of salt.  Like put in what you think is too much, and then add a little more.  They'll be delicious.  I promise.

All the necessary food groups! savoury fried stuff, protein rich fried stuff, sweet fried stuff, and seasonal sweet miniature fruit! I haven't tried frying clementines.  Doesn't mean I won't, but.... no, I won't.


Potato Latkes  Recipe by Sassy Radish, adapted from Martha Stewart


Ingredients:

4 large russet potatoes, peeled
1 small white onion, finely grated
2 large eggs, lightly beaten
3 tablespoons all-purpose flour
1 tablespoon coarse salt (I used 2 Tbs, and while that's certainly on the salty end, 1.5 would do nicely)
Freshly ground black pepper
Vegetable oil, for frying
Applesauce – optional
Sour cream – optional

Method:
1. Preheat oven to 200 degrees. Shred potatoes using the large holes of a box grater into a large bowl of ice water. Alternatively, place half the potatoes in the bowl of a food processor fitted with the shredding disk attachment and process until shredded. Repeat process with remaining potatoes; transfer to a large bowl of ice water. Using a strainer or slotted spoon, transfer potatoes, reserving liquid, to another large bowl lined with a clean kitchen towel; gently squeeze dry.
2. Set reserved liquid aside for 10 minutes to allow starch to sink to the bottom; carefully pour liquid from the bowl, reserving milky residue (potato starch), and discard. Transfer potatoes back to bowl with potato starch.
3. Add onions to bowl; stir in eggs, flour, salt, and pepper.
4. Line a baking sheet with paper towels; set aside. In a heavy nonstick skillet, heat 1/4-inch of oil. Spoon scant 1/2 cup of potato mixture per pancake into skillet, working in batches and taking care not to crowd the skillet.
5. Fry on both sides until golden brown, 4 to 6 minutes. Transfer to prepared baking sheet to drain; transfer to oven to keep warm. Repeat process with remaining potato mixture. Serve hot with applesauce, sour cream, or a jelly filled donut (because donuts are delicious and culturally deemed mandatory [okay, simply strongly suggested, but I just gave you an excuse to eat a donut, are you really going to argue with me?!])

And there you have it! For a less traditional serving, latkes go great with a similarly salty meat product known as bacon (actually probably any kind of pork.  I'm sorry, Bubbie!).  Serve 'em up hot with whatever fixings your heart desires, and enjoy brunch, kiddies!!

So, what are you making for brunch this Sunday?

--Erin

Friday, 30 November 2012

Super Brunch Sunday: Buttermilk Pancakes with Warm Apple Cinnamon Topping

Last weekend's brunch was sooooo good.  The perfectly cooked buttermilk pancakes (thanks to Ephraim!), topped generously (I may have added more after these photos, that stack got messy) with warm, gooey, cinnamon loaded apples.  It was like pie filling, but better, because it obviously used to be something that's good for you.  Used to be.  But that time had long since passed.  YUM.

Buttermilk Pancakes (modified from Fannie Farmer's 1945 recipe) Serves 2

Ingredients

1 1/2 cups flour
2 1/2 teaspoons baking powder
3 tablespoons sugar
3/4 teaspoon salt
1 egg, slightly beaten
3/4 cup buttermilk (or more)
3 tablespoons melted butter (or vegetable oil)
Method
  1. Mix together the dry ingredients. 
  2. Add the beaten egg and melted butter and stir vigorously, adding more milk, if necessary, to make the batter just thin enough to pour. 
  3. Drop by spoonfuls or pour from pitcher onto heated and greased griddle or frying pan using medium heat. 
  4. When full of bubbles and the underside is browned, turn and brown the other side. 
  5. Serve with maple syrup and additional butter (and apple topping.  Come one now.)
Cinnamon Apple Topping (modified from This Homemade Life)
Ingredients
 2-3 apples, peeled and chopped
1 tablespoon butter
2 tablespoons dark brown sugar
2 heaped teaspoon cinnamon
1/2 cup of water

Method
  1. In a skillet, on medium heat, melt the butter.  
  2. Pour in the apples, and saute until just tender.  
  3. Add in the sugar, cinnamon and water.  
  4. Continue cooking (and stirring) until it reaches a syrup-like consistency.
If you like the plate, I won't tell anyone.  I was pretty tempted with this one! And I am happy to report that the leftovers were SUPERB brought in to work to eat at my desk a few days later.  You'll want to double the pancake recipe though!

What are you making for brunch this weekend?
--Erin

Friday, 16 November 2012

Super Brunch Sunday: Baked French Toast

Last weekend, I knew I wanted to make french toast.  But how to make french toast fancy, worthy of the Super Brunch Sunday name? We were already using special bread, so that was a start, but we knew there had to be more.  Ephraim suggested a sauce, and when I found THIS Martha Stewart recipe for Baked French Toast with Raspberry Sauce, I knew it was what we needed; along with our special raisin challah! Some bananas and maple syrup on top of that, and we were in business.

Raspberry Sauce

Ingredients

1/4 cup sugar
1 bag (10 to 12 ounces) frozen raspberries (or strawberries), thawed

Directions

  1. Meanwhile, in a medium bowl, combine raspberries and remaining 1/4 cup sugar, mashing lightly with a fork. That's it.  Yummy.

Baked French Toast

Ingredients

4 large eggs
1 1/2 cups whole milk
1/4 cup sugar
1 teaspoon pure vanilla extract
1/8 teaspoon salt
4 thick slices challah, brioche, or other egg bread (1 inch thick)
2 tablespoons unsalted butter, melted
1 teaspoon (or more) cinnamon

Directions

  1. In a 9-by-13-inch baking dish, whisk together eggs, milk, 1/4 cup sugar, vanilla, and salt.
  2. Arrange bread in dish in a single layer; let soak 15 minutes. Turn bread over; cover, and refrigerate until most of the liquid is absorbed, at least 30 minutes and up to overnight.
  3. Preheat oven to 350 degrees. Brush a rimmed baking sheet with butter. With a spatula, carefully transfer soaked bread to sheet. Bake until French toast is set in center and lightly browned on the bottom, 25 to 30 minutes.
  4. Remove French toast from baking sheet with a thin metal spatula; serve with raspberry sauce and, if desired, sausage.
What are you making for brunch this Sunday?

--Erin

Tuesday, 13 November 2012

Recipe: Fried Rice with Tofu

One of my favourite things to make for dinner is fried rice.  It uses up the veggies in my fridge that are on their last legs, keeps day old rice interesting, and is full of protein.

Ingredients:

Assorted Vegetables (corn, peas, carrots, broccoli, peppers etc)
Day old rice
Soy sauce
1/2 Cup tofu, cubed.
1 egg, scrambled
Sesame oil


Method:
  1. Fry your tofu in sesame oil until browned.  Flip, and let brown again. Remove from pan to a bowl.
  2. Scramble egg, then set aside with tofu.
  3. Crumble leftover rice into pan, using chopsticks to break clumps apart. Drizzle with sesame oil
  4. Add vegetables to rice according to cook time.  
  5. Add soya sauce to taste
  6. Reintroduce tofu and egg.  Stir until heated through.
Enjoy! This super easy meal is quick to prepare, and mighty satisfying.  Plus, it can be very easily modified to be vegan; just omit the egg! 

--Erin

Monday, 5 November 2012

Rainy Days are for Baking: Chocolate Chip Pecan Cookies

We've had our fair share of rain in these parts lately.  To combat the gloom I whipped up a batch of these cookies.  t certainly did the trick, and I happened to already have all the ingredients in the house.  Hooray!

Chocolate Chip Pecan Cookies (Originally from Delish)

1 1/2 cups pecans
1 stick unsalted butter, at room temperature
1/2 cup firmly packed dark brown sugar
1/2 cup granulated sugar
1 large eggs
2 tsp vanilla extract
1 cup + 1 Tbsp all purpose flour
1/2 tsp baking soda
1/2 tsp salt
1 1/2 cups chocolate chips

1. Preheat oven to 350 degrees. Arrange nuts in single layer on baking sheet and toast in oven 5-7    minutes, until golden brown and aromatic. Cool the nuts and then coarsely chop.
2. Line baking sheets with parchment paper. 
3. Cream butter & sugars on medium speed about 1 minute, until fluffy. 
4. Add the eggs and vanilla and beat on medium speed for 1 minute. 
5.Add flour, baking soda and salt. Mix on medium-low speed until incorporated. 
6. Add in nuts and chocolate chips and mix well.
7. Drop dough onto prepared baking sheets. Bake 10-12 minutes, until cookies are medium-brown around the edges.

I have been making an effort to cook more, and thus have decided that for the month of November, I will not be going out to restaurants (with the possible exception of my Grandfather's birthday dinner in a couple weeks).  I hope this pushes me to learn a few new recipes, and carry over the good (money saving!) habits into the coming months.  And forever.  I hope. What this means concerning this blog, is that I will be posting more recipes this month (and hopefully in general in the future!) for you to make at home and enjoy.

Or just look at the pictures.
No judgment.

Happy baking!
--Erin

Tuesday, 9 October 2012

Butter Tarts: A Thanksgiving Treat

This past weekend was thanksgiving in Canada.  As I was invited up to my boyfriend's parents house in cottage country for the long weekend, I whipped up some butter tarts to bring along with me.  And by whipped up, I mean I went in with some serious apprehension.  But hey, my mother taught me to never arrive empty handed, and I do try to push myself at least a little bit.  Turns out these are ridiculously simple, especially if you're a whiz at pastry (I am not).

This was my first attempt at butter tarts, so I cheated a little and bought pre-made tarts and only concerned myself with the filling.  If we're being honest, I have yet to make a pastry I am satisfied with, and since I was feeding these to someone else's family (and a family I would like to impress), I figured I should subject them to only one experiment at a time.  These were such a great success, I'll be making my own pastry to hold the deliciousness next time around.  Oh, say, for Christmas perhaps? Yum.
Here's the recipe I used, originally from Wilkie's Bakery in Orillia, Ontario:


pie pastry (enough to fill 12 muffin cups, your own or from a mix) (or store bought pre-made, HAH)
1/2 cup raisins
1/4 cup soft butter
1/4 cup packed brown sugar
1 pinch salt
1/2 cup corn syrup
1 egg, lightly beaten
1/2 teaspoon vanilla

1. Prepare muffin pans by rolling out pie dough and cutting 4-inch (approx) circles; fit dough circles into muffin cups; set aside in fridge until ready to fill.
 
2. In a small bowl, place raisins and cover with hot tap water; let stand on the counter for 30 minutes.
 
3. In a large bowl, using a wooden spoon, mix together the soft butter, brown sugar, salt and corn syrup; stir well until sugar is dissolved and butter is creamed.
 
4. Add egg and vanilla and mix well.
 
5. Drain raisins.
 
6. Retrieve tart shells and divide raisins equally into all shells; then divide butter mixture into all tarts.
 
7. Bake at 400F for 15-20 minutes; filling will be lightly browned but still bubbling.
 
8. If you like firm filling, bake them for the full 20 minutes, even adding another minute or two if you wish. Shave a few minutes off for a runny centre. 
9. Let cooked butter tarts cool in pans for 10 minutes after removing from oven; then remove and place on racks until completely cool.
Be warned, you will eat one of these with every cup of tea or coffee you have after you have baked them, and you will also probably sneak one for breakfast, too.  I know I did! Also be warned that these are really REALLY easy to make, and you will remember how fast they are and will want to make them all the time.

The solution to this is simple: SHARE!!

All the deliciousness, and at least half the guilt.

Enjoy!

--Erin

Monday, 20 August 2012

My Weekend in Retro Specs v.6: Occupy NOTL

Howdy friends, and happy Monday!

This past weekend was a real blast.  I had a couple friends staying with me, so naturally there was much good food, some wine, some cheese, lots of laughter, the good stuff, ya know?

Some highlights:
  • Friends from different points in my life all hanging out together, getting friendly themselves
  • Wine and cheese!  7 year old cheddar.  Hell. Yes.
  • Treating my friends to a play.
  • Breakfast Massacre: Niagara Edition
  • Getting to make good use of my waffle iron at said massacre.  Tasty tasty carnage.
  • Talking and laughing till 4 am.
  • The most delicious of frozen chocolate peanut butter pies.
  • Receiving a skein of wool that my friend Caroline made! I'm talking cleaned the wool, spun into yarn with a spinning wheel and then hand dyed, all using techniques predating 1860.  Hardcore!!
I kept my camera in my purse and a smile on my face.  It really is the little things. 
LOGWOOD CHIPS MAKE THINGS PURPLE.  Natural dyes are weird, and totally cool.  BTW, logwood, is more than just logs of wood.  We learned this weekend!

I am so ridiculously impressed by this being even possible, let alone one of my friends doing this as her job.  If you visit Black Creek Pioneer Village, be sure to pick up some of Caroline's yarn from the gift shop. I hear they have trouble keeping the stuff in stock, and now that I have my own skein, I can see why! so cool!

In preparation for cooler temperatures, I think I'm going to use the yarn to make some boot toppers, though I think I'll need another skein.  I've totally given up on ever figuring out the heel turn, so socks are officially out of the question.  I'm not much of a knitter, but I'm learning! 

In other news, a year ago this evening I had the most amazing and ridiculously long (8.5 HOURS) first date.  Thankfully we went to a 24 hour coffee shop and bistro, because no where else would allow us to have just sat and talked and drank coffee/tea for 8 hours.  Well I suppose at some point we did order dinner, but we also witnessed a couple shift changes.
Needless to say, it has been a really, really, really great year.  I can't wait to celebrate with Ephraim next weekend!

But first, I have an insane work week to tackle.

--Erin

Thursday, 26 July 2012

Veggie Eats: Zucchini Parmesan and Asparagus


I've been a vegetarian for... oh, 8.5 years now, and recently I've been feeling like I'm relying a bit too much on soy products to make simple, delicious and nutritious meals for myself.  While this worked pretty well in University (especially since my omnivore roommate and I typically cooked "family style", so my dinners had to be accessible to meat eaters. 
Plus, you know, generally those meals turned into carb-loaded deliciousness.  Which I love.  But I'm trying to diversify a little bit.


Anyhow, a little while ago I finally made Eggplant Parmesan for myself, and it was a revelation.  So crispy, cheesy, and with some spicy sauce...mmmm! I had intended to do the same yesterday, but my grocery store was all out of Eggplants.  And the Zucchini was looking pretty sad.  But I figured I'd be frying it anyway, so I brought two home. Also, Asparagus was on sale, and for the first time, oh, ever, it caught my eye.


I need to tell you something.  I have lived the majority of my life thinking that I hated asparagus.  Like, truly loathed.  It was the vegetable my step-mother made all the time when I was growing up, and to me it became synonymous with bitter, chewy, stringy, brown-green grossness.
Turns out I'd just been eating improperly cooked asparagus, because this was delicious.  And such a gorgeous vibrant green! I mean seriously, how could you not just dig in?!


Check out some photos and my recipe after the jump!