Do you ever decide you want to take some outfit photos, only to find that it's started to rain? Yeah. Well, luckily, one of my favourite places to take photos in town is actually on the covered porch of a church! It was just a spattering of rain anyhow, nothing strong enough to stop us from going out.
In other news, I quickly went from someone who didn't own a pair of sandals (for several years. Nearly a a point of pride) to being totally obsessed with my saltwater sandals. I want to wear them all the time. They're so comfy, and PLAIN!! I can't tell you how sick of gladiator sandals and rhinestones and spikes and everything I am. I wanted plain shoes I could wear with most of my summer dresses, and I think I did very well. Now, to wait for those hot sunny skies...
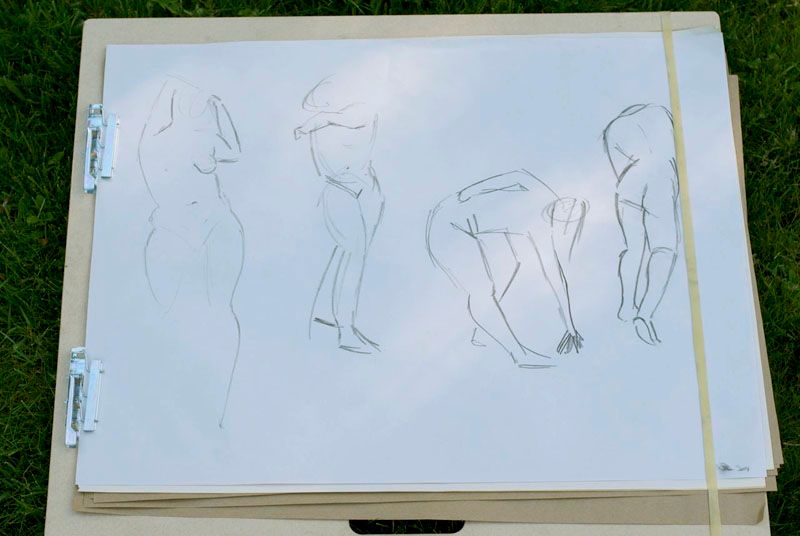
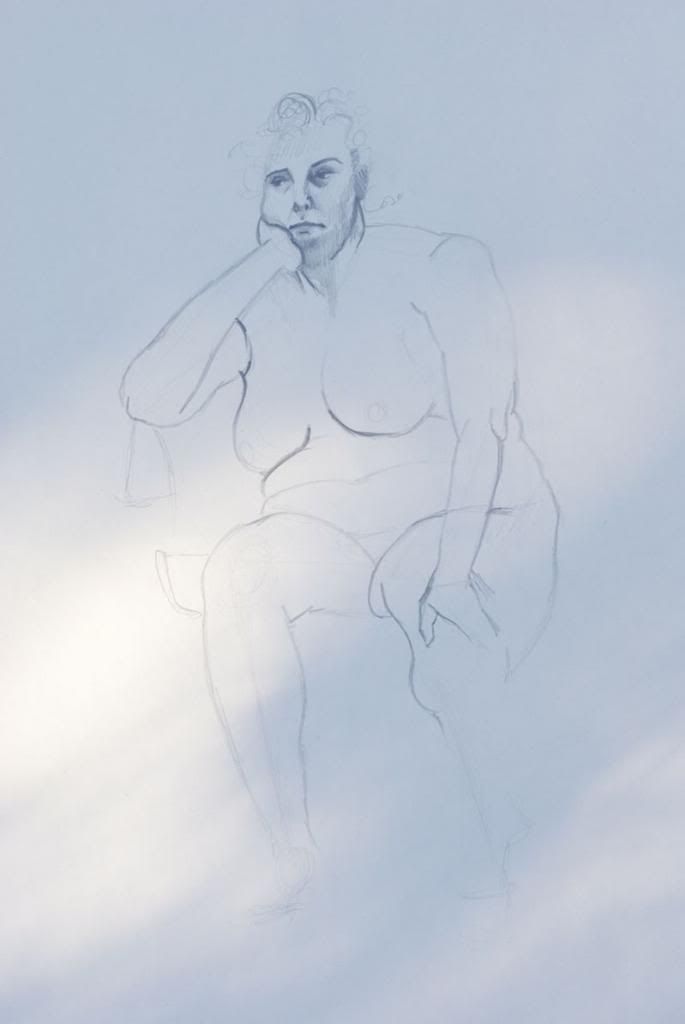
1 minute gestures from week 2. Gesture drawings are a quick representation of the movement of the body. Every artist does these TOTALLY differently. Some people draw squiggles, or cage like forms of the body. You do these first to loosen up, and get used to looking at the body as a complete unit capable of so many different angles that play off each other. Claw/noodle hands optional (unless you're me).
One of my biggest goals for this year was to start taking life drawing classes again. I did life drawing classes as a degree requirement for a few years in University, but otherwise did not pursue life drawing as a hobby and devoted practice time outside of my studies. This is something I really wanted to change, as my rendering style as a costume designer is something that I find really important, and can be a great opportunity to express your individual aesthetic as a designer. And, well, you have to know what the human body looks like, if you're going to design clothes for it (and then try to draw the whole thing so someone else can build it!). This is why drawing naked people for a few hours every week is a good idea. Plus it's incredibly relaxing and fun. I've been taking a drop in life drawing class for about 5 or 6 weeks now (not counting the ones where I didn't make it to class), and I've already seen quite a bit of improvement. Here are my favourite works from each session.
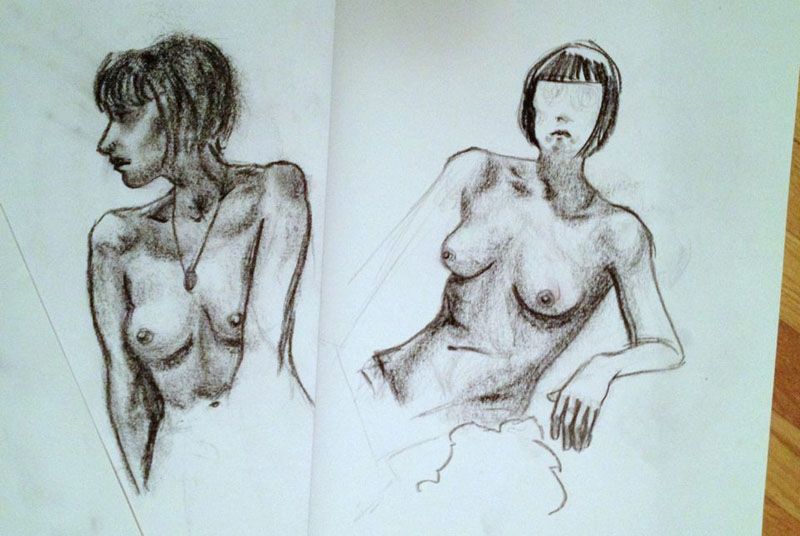
Week 1// conte crayon and newsprint. I enjoy drawing breasts from real life, because the light and shadow has to be just right to express fullness. Most women's breasts are not perfectly identical, and capturing this, or the way the pose changes the breasts (such as the pose on the left) is really tricky.
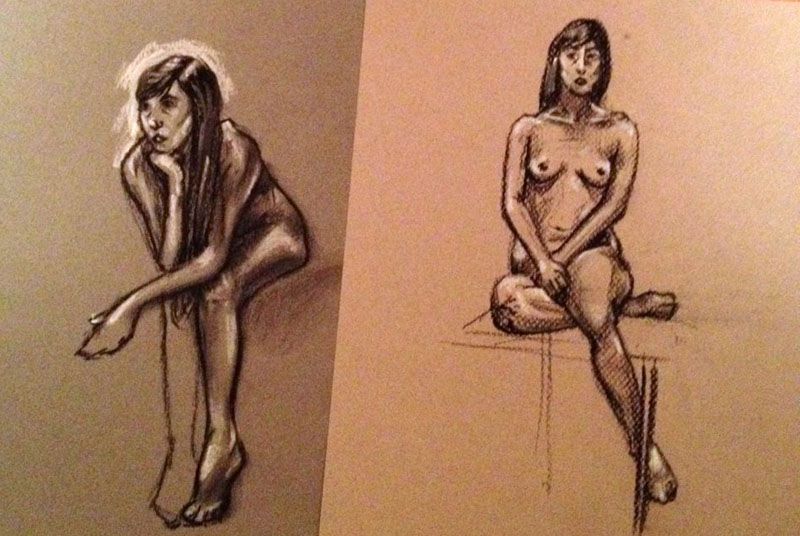
Week 2// Conte crayon, chalk and grey pastel paper in 2 shades. Sometimes your model is a fidget, and you end up drawing their hands and feet and flippers because the moment you go to flesh them out, they start moving the part you're focusing on. True story. #lifedrawingproblems
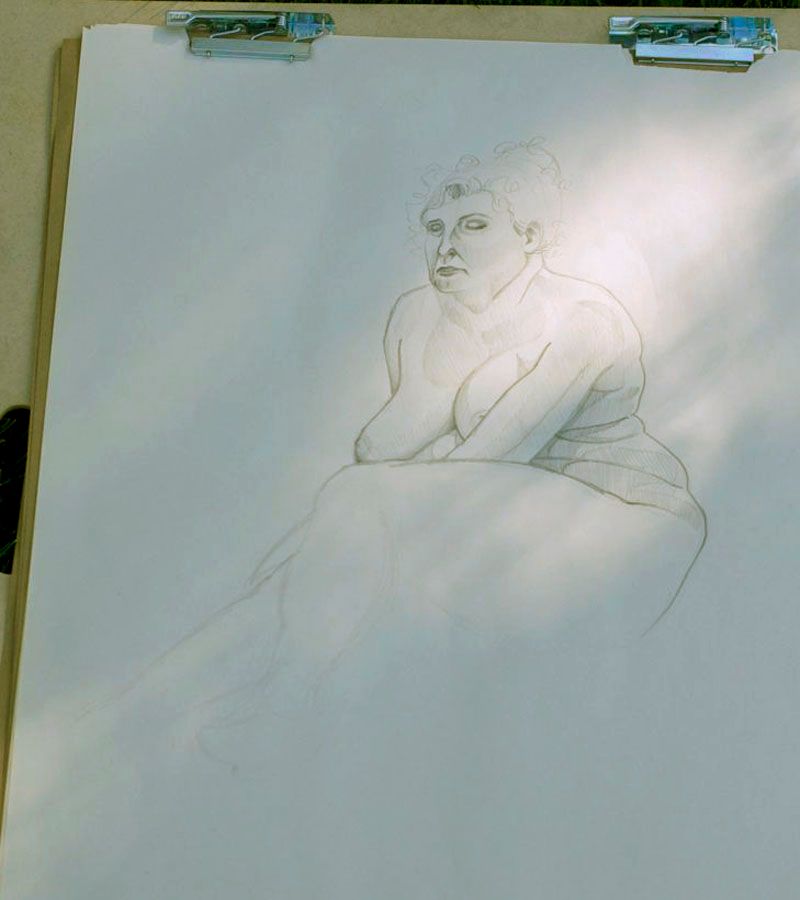
Week 3// Pencil and Newsprint. I have always loved the illustrative style of comic books, but never really had a handle on doing shading in such a graphic way. I tried to approach the drawings with this in mind, this week. Also I find drawing eyes difficult, especially from observation. Is it just me, or do the models tend to look around a LOT? 90% of the time I end up with something vaguely crosseyed. It's so much worse if the face is at 45', Anything beyond the nose is constantly shifting!
Week 3// Pencil and Newsprint. I likewise tried line as expressively as possible, to imply depth without shading and additional contouring. I am not by instinct a minimalist, which makes cartooning and water colour very difficult mediums for me.
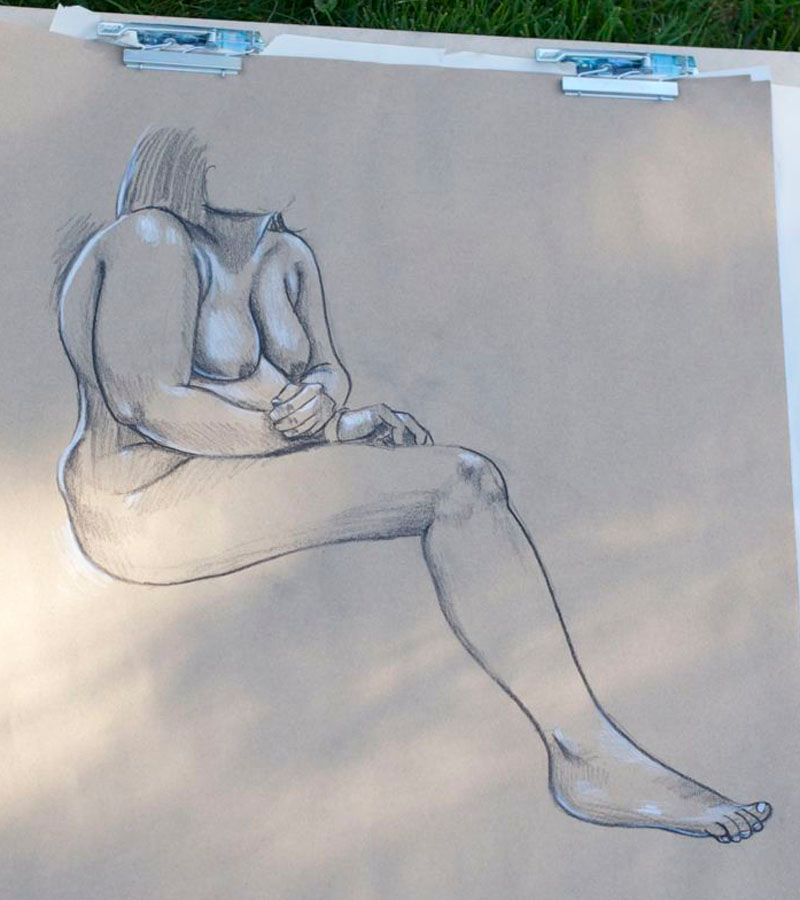
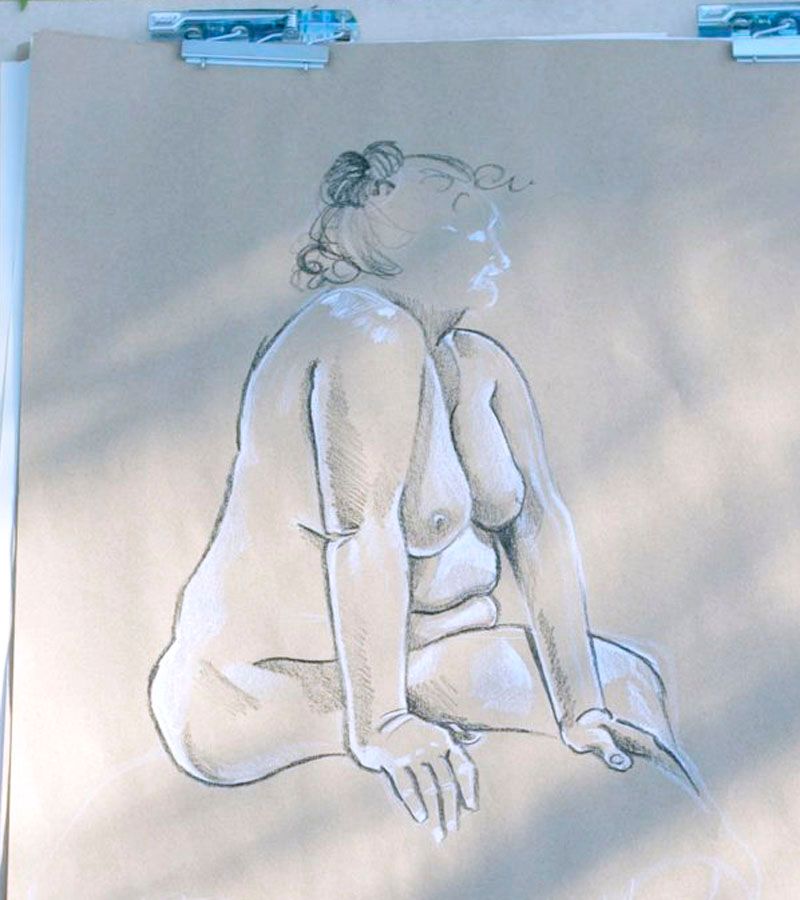
Week 4// black and white charcoal pencils and kraft paper. After the success from my experiment drawing highlights and shadows on coloured paper, I picked up some charcoal pencils and large format kraft paper while in Toronto. Living in a region with no dedicated arts supply store makes classes like this difficult, and I have to stock up before things become dire.
The first couple weeks of this class I tried to focus on using different mediums, to find something I really enjoyed working with. I knew from university that I liked conte crayons, but I found quickly that I was trading exactness and detail for quick brushy shadows a little too much for my liking. Then after that I discovered how much I LOVE being able to put in highlights, by using chalk on a coloured paper. I found that working off a "medium" tone instead of the bright white (or close, haha) of newsprint, made me feel I could push my shadows more, and really sculpt the body. So far so good! I had some old charcoal pencils hidden away in my drafting table at home from a kit a friend gave me years ago, and loved the balance of control, fluidity and tone: being able to buy something in "light" "medium" and "dark" made laying out blocky shapes and continually refining really easy and less stressful if I made a mistake. I do not use an eraser for life drawing, so if it's a dark line, it's there to stay. And suddenly, your drawing has 3 arms...oops!
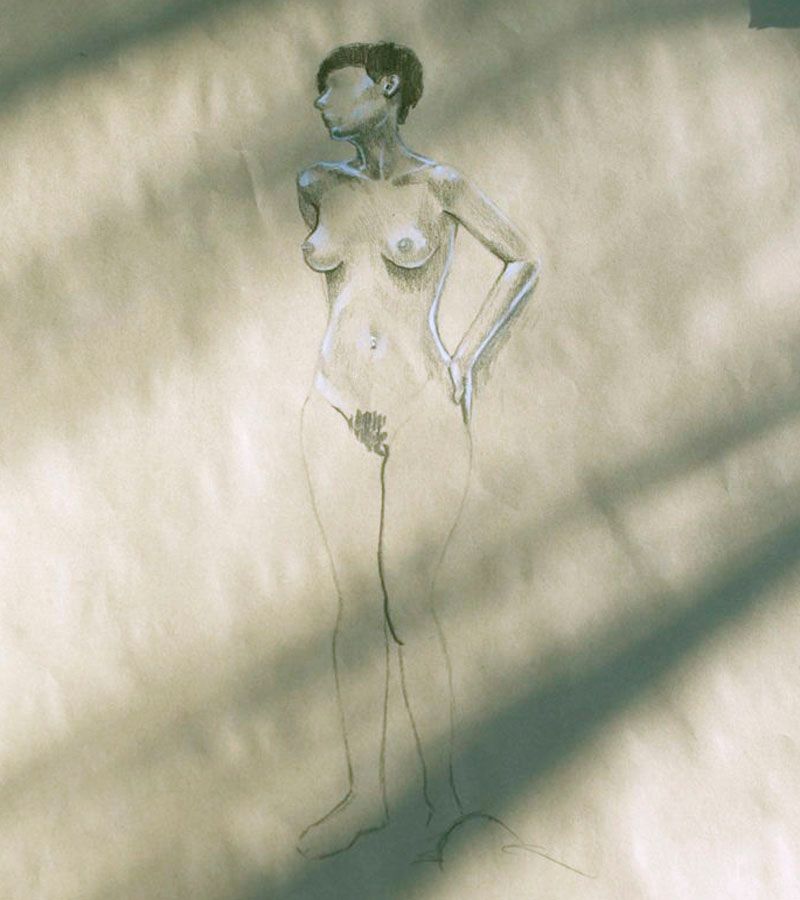
Week 5// Blacka nd White Charcoal on Kraft paper. This was the same model as the first week, with a sweet new haircut. I immediately notice how much more balanced and connected her shoulders and clavicles look here, compared to the first class. I still need to work on laying out my darkest darks first, as gradually building them takes too much time. Even in a 20 minute pose like this, I don't get the whole figure fleshed out.
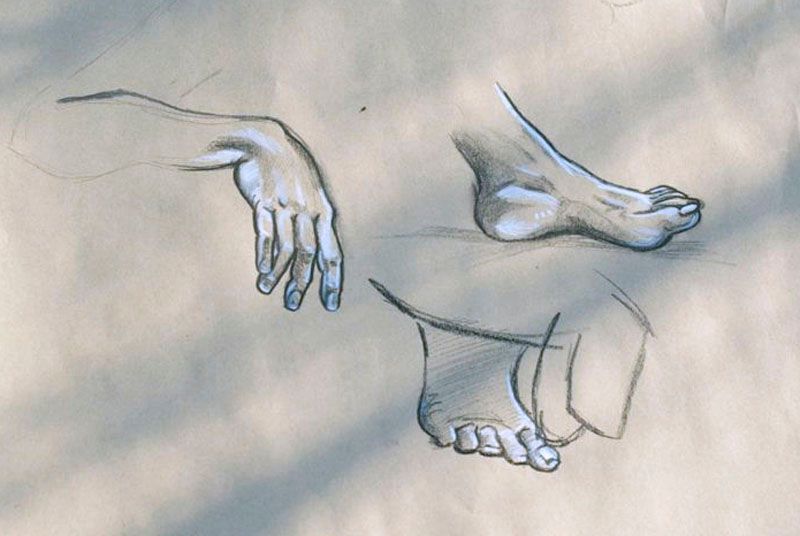
Week 6// Sometimes, a pose is too similar to be worthwhile, or I feel I'd get better practice working on something more specific. Hands and feet are notoriously difficult, so I'm trying to dedicate more time to sketching just these from life. I'm particularly happy with the foot on top. The balance of light and shadow around the ankle gives the bone a crisp line, but indicates the fulness around it. The model flexed her toes every time I tried to draw them. It drove me nuts.
So far in this process I've been focusing more on accurately laying out the body and keeping things proportionate, than I have developing style. I finally feel like I can start delving into that more, now. As a challenge to myself, this week I tried to start a drawing not with the shadows, but with the light. I think that because there tend to be fewer stark highlights on the body, I find it easier to keep the distances between them more accurate, and I think it lead to my best life drawing to date (below). I'm particularly happy about her right arm and bent wrist. I think the weight resting on it looks plausible.
Week 6// black and white china marker on kraft paper. China marker is like the awesome freak-baby produced if oil pastels, pencil crayons and permanent markers managed to spawn. Glides beautifully over paper, makes it very easy to get bright brights and dark darks, but only offers a small range of responsiveness to pressure. So, you can cross hatch, but traditional shading is out of the question. But it makes you strangely bold to work with something so accepting of a heavy hand (like mine).
Though I've only been doing life drawing regularly for about 2 months, I can already see how drawing the body from observation offers the greatest insight to how the body is constructed, and how this can inform any drawing of people outside of class. I see this time helping me reach my own goals as an artist, with the incredible work I get to see every day motivating me to keep pushing myself and to try new things. I can't wait to get a couple more sessions under my belt and then apply what I've learned to the 3 shows I will be designing this summer. I'll do another bulk update on life drawing in a couple months, but if you want to see what I'm up to, I instagram my favourite piece or two from each class (@efgerofsky)
Are there any skills you have been working on lately? And any other artists in the house?
Back when I started this blog (nearly a year ago, whoa), I had a weekend review feature called "My Weekend in Retrospecs". Shortly thereafter it was changed to " My Month in Retrospecs", as a pun that good should only be used so frequently. Recently I've been feeling better prepared to choose my favourite posts of the month due to a stronger posting schedule (eep, except for this week! I'm in Tech Week for a show at work, which includes some 13 hour days and has certainly meant a lot of photoshop time for me! After editing things all day, the last thing I wanted to do was edit at home) but I think that finding 5 favourite posts for the month should be doable, haha! Plus, I think that having a monthly recap would be a nice thing to look back on. So... I'll be better about that, starting right now.
I'm also combining my yearly goal updates as part of the retrospecs feature. It just seems like a good fit. So let's see what was up with those the last 4 weeks!
blog 4 times a weekHahaha.. that's all I have to say about that! Let's not worry so much about this one going forward.
complete my 365 Days of iPhone Photos project
complete one photo-an-hour post for each monthTotally on top of this one. Editing my April photos as soon as photoshop seems... not like the only thing I ever do.
save my pennies and purchase a new laptop to replace the 8 year old glorified paperweight
take a tripI'm writing a grant proposal that would see me going to Calgary for a couple weeks in the fall. It'd be for work, but, y'know, mountains, so... fingers crossed!!
create more, and consume less Netflix (or knit while I watch!)Been working on that dress on and off, but I've been feeling so burnt out from work as we're in tech week for a show that starts previews late this week. So tired...
read 6 books (this makes me sad. how did it come to this?!)I read the first compendium of The Walking Dead this month, which covers the first 8 trade paperback volumes. I devoured it in a week, and I regret not buying the second compendium at the same time! I'm not sure how to count it, toward my goal of 6, however! But at over 1000 pages, calling it 2 books instead of 1 (or 8) seems fair! I'm also working my way through Stiff, by Mary Roach. Blog, Inc. has been put on the backburner, after hitting a couple chapters that feel below my experience, and feeling a bit discouraged as to the value of the advice given. Not leaving it behind forever, though.
create an online portfolioUmm... nope.
look into continuing educationI looked more into doing my masters, this month. Should I get to travel to Calgary to do some work this fall, I'm going to take the opportunity to head to Edmonton and see if the University of Alberta seems like a good fit for a place to do my masters.
take my camera with me more (and invest in a serious camera bag)Still waiting for this Epiphanie bag I ordered a couple weeks ago. I had it shipped to my work, and the USPS says it's been delivered, yet I do not have it yet... If I don't have it by the end of the day, I'm going on a hunt. I want my bag!
invest more time and effort into friendships, old and newI'm too tired for other people. Fact.
send 6 pieces of snail mail Or to write letters.
build a small business
exercise twice a weekI actually talked to my dad over dinner last week about weight lifting goals I'd like to achieve. It's been a good motivator!
take life drawing classes
get a car
**Editing this quickly to say, I just realized that my birthday is less than a week away! And though my birthday tends to bring some bad things (possible voodoo curse type territory, it's bad) I am really excited. I'm staying in NotL this year, I mean really, nothing ever happens out here let alone anything bad! But let's not tempt fate. Just... eee! I'm excited.**
For those of you who live only to scour the interwebs for the coolest and craftiest of websites, this will be old news, but for those of you with other tasks that must get done (and really, I'm sorry, because all of those other important things are about to go straight out the window) I'd like to introduce you to Cut Out + Keep.
Cut Out + Keep is an online community where people share their crafty tutorials in categories such as cooking, sewing, papercrafts, and crocheting (but it doesn't stop there!). I first discovered Cut Out + Keep about 7 years ago, sitting on my tiny dorm room bed using Stumble Upon (THE internet discovery tool, for those of you who do enjoy a little scour now and again) into the late late hours of the night, looking for something to DO. And from that moment on, I knew I'd never be bored again (materials willing).
What I didn't know, or rather, haven't bothered to pay much attention to - I'm there for the crafts. What do you mean I can whiten my teeth with clove oil?! - is how much the community has grown since I first happened upon it so many years ago. Cut Out + Keep is now in its 10th year and boasts over 120,000 members and 50,000 projects; not bad considering the community started as the personal craft blog of founder Cat Morley.
Cut Out + Keep was also recently featured by google in a video promoting their advertising service, that offers an amazing look around Cat's creative space, and a little information behind the business side of Cut Out + Keep.
When Cat emailed me to tell me about how much Cut Out + Keep has grown over the last few years, I was a) Super flattered to be on her radar (I mean, guys, WHOA) b) SO inspired by how many individuals are getting into crafts in a serious way. I think that resurgence of the cottage craft industry is incredible, and websites like Cut Out + Keep make people feel empowered to do things themselves, try something new, and maybe even find a new passion. Plus, I think that some healthy competition in capitalism is really important (and serves to save us all a little bit of money, as well as offer up an abundance of choice). So, that's a win, win, win, win... right? Right!
If you were totally enchanted by the chalkboard bunting in the video like I was, Cat was also kind enough to send along a tutorial on how to make your own! See? Empowerment! Crafts! Joy for all, and bunting for every occasion! (I'm excited. Sue me)
1// Start by cutting triangles out of thin wood. We used some scrap shipping wood that came as packaging with a piece of furniture. You can buy wood triangles in craft shops, if you struggle to find a piece that works well. You'll need about 12 triangles to be able to write a nice long message.
2// Paint your triangles with a coat of chalkboard paint and leave to dry.
3// Paint with a second coat of paint and leave to dry again.
4// Punch a hole at either side of the top of the triangle. My wood was thin enough to use a hole punch.
5// Loop some string through the hole.
6// Secure at the back with a knot and then string through the second hole, securing with another knot.
7// Leave a small length of string between each triangle and continue threading them all on to the string.
8// Now the fun part. Write on your bunting with chalk. I used a ruler to give mine a neat outline, but you can decorate yours however you like!
9// Hang up and admire your handy work!
Umm, so, that was awesome. I would love to make this for my dream studio! Well, at least it would start off there, but since this bunting can be rewritten for whatever you please, I could see it making appearances at birthdays, major holidays, Wednesdays, you know, the works! A big thank you to Cat again for sharing this super sweet and even more versatile DIY. I mean, can you imagine this with coloured chalkboard paint?! It would be unstoppably adorable. The best kind.
And as if that wasn't enough, Cat even graciously agreed to answer a couple questions I had for her about her creative journey.
What was the first craft that you made a significant hobby? Was this sparked by a particular project?
There wasn't one particular craft or project that sparked my love of crafting. I love trying my hand at different types of crafts and learning new skills, so my projects have always been a big mix. My two favourites are definetely sewing and jewelry-making because they're crafts you can show off. I love wearing something that no-one else has and it’s so satisfying being asked where you bought something that you’ve made.
What has been the most exciting part of seeing your crafting community grow?
The growth of the site has been so gradual that we sometimes don't realize how big it's become until we hear our friends tell us about people they've met in far flung countries that are members. It's so exciting to wake up every morning and see all the new projects that have been added and I absolutely love it when someone posts their own version they've made of one of my projects.
If you could impart any advice about this journey to your high school self, what would it be?
I'd tell myself to have confidence and keeping doing the things I love. I was never sure what I wanted to be when I left school, so I spent a lot of time worrying about that. Luckily, I kept doing the things I was passionate about and enjoyed the most until that became my full-time job.
What motivates you to get creative? Be it a phrase, feeling, motivational-kitty-poster or what have-you.
I have scrapbooks and Pinterest boards full of ideas and inspiration and recently I made a set of motivational magnets (http://www.cutoutandkeep.net/projects/motivation-magnets) for all of the creative activities I sometimes neglect, so I can add them to the calendar on my whiteboard and remember to work on them when I get a chance.
A big, big thank you again to Cat Morley for this exciting DIY, and for the inspiring words. I don't know about you guys, but I am feeling good and ready to create something fun this weekend!!
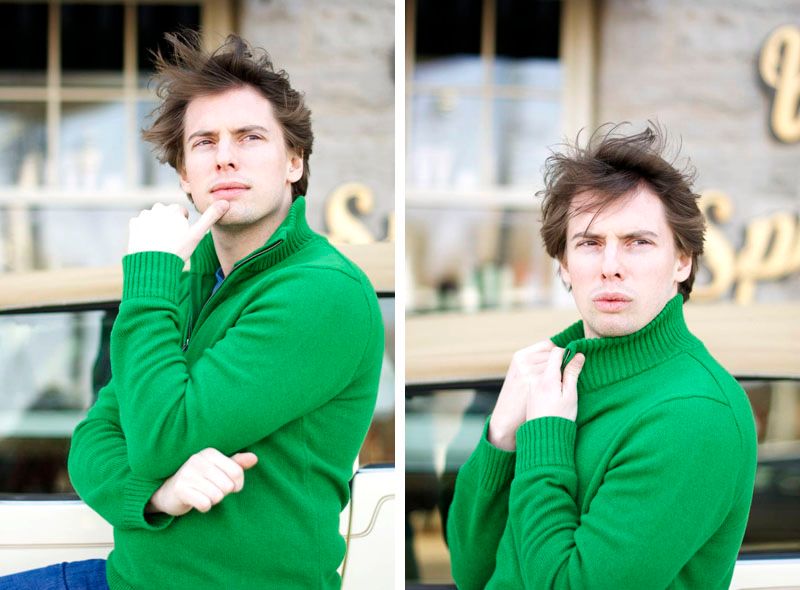
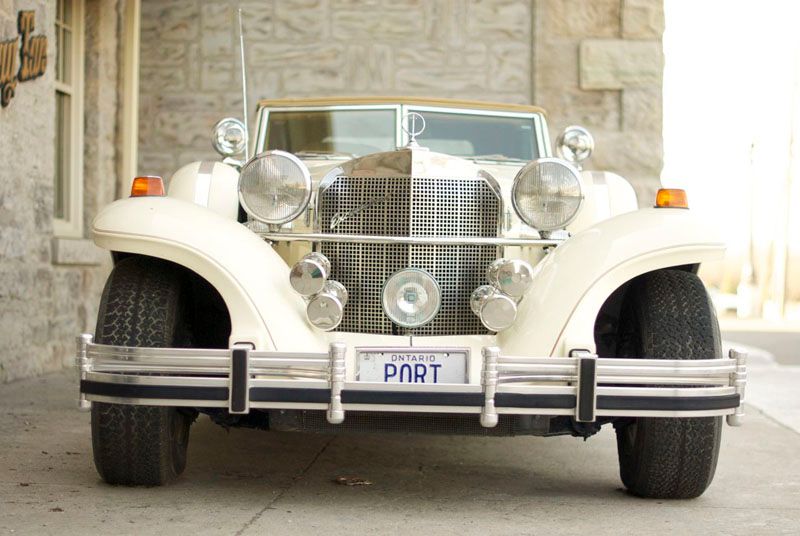
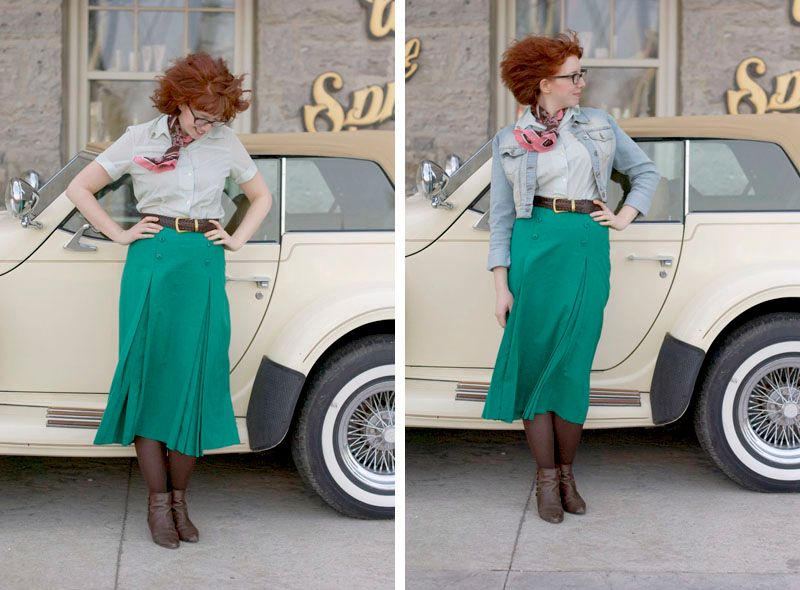
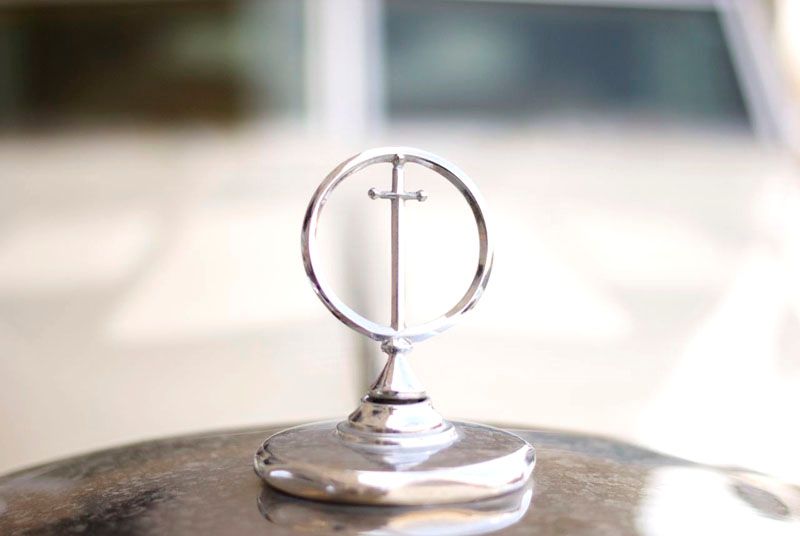
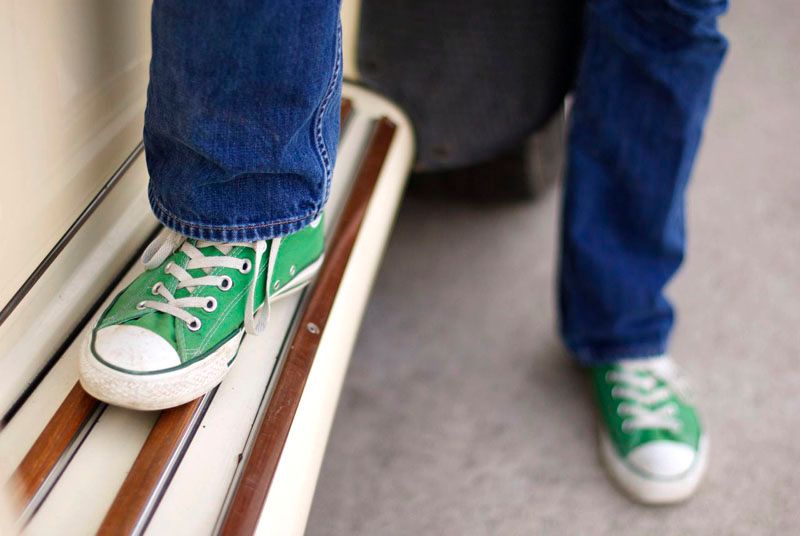
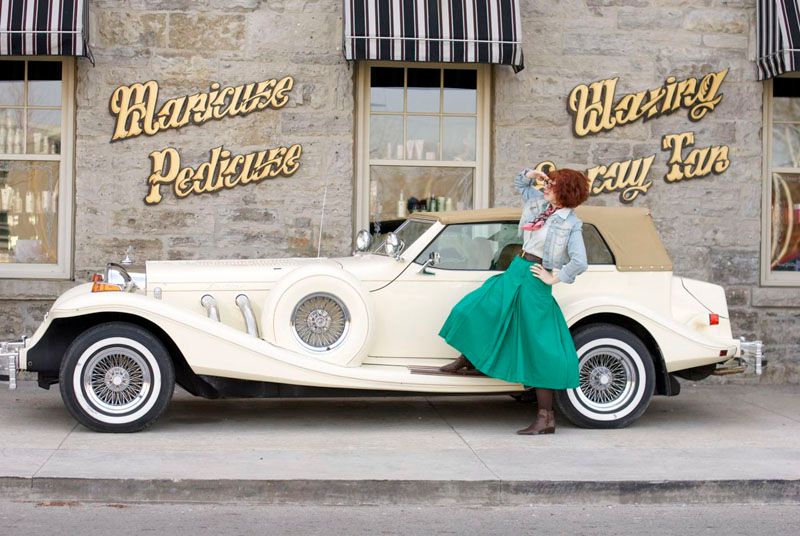
These photos were something of a spur of the moment type happy accident. It was the first really warm and sunny day this year, and Ephraim and I spent the afternoon running errands in St. Kitts, with the plan of finishing up with going to see the new Evil Dead movie. But wouldn't you know it, we ran out of things to do a good hour before the movie started, and so we hunted for a coffee shop to wait in. In our search we ended up trying to turn around in this parking lot, and found this SUPER SWEET old car!! And well, when you come across a beaut like that, no matter how windy it is (and oh, was it ever!!) you take some photos! So here we are showing off how much green the two of us can wear. This was unplanned, but dammit, neither of us was changing, that might be dumber than coordinating our clothes to begin with!
I can tell it's going to take some getting used to and maybe a bit of problem solving to deal with just how incredibly crazy the wind makes my hair now that it's so much shorter. It looks like I'm going to need to invest in a few more hats! Which is a solution I can really get behind :).
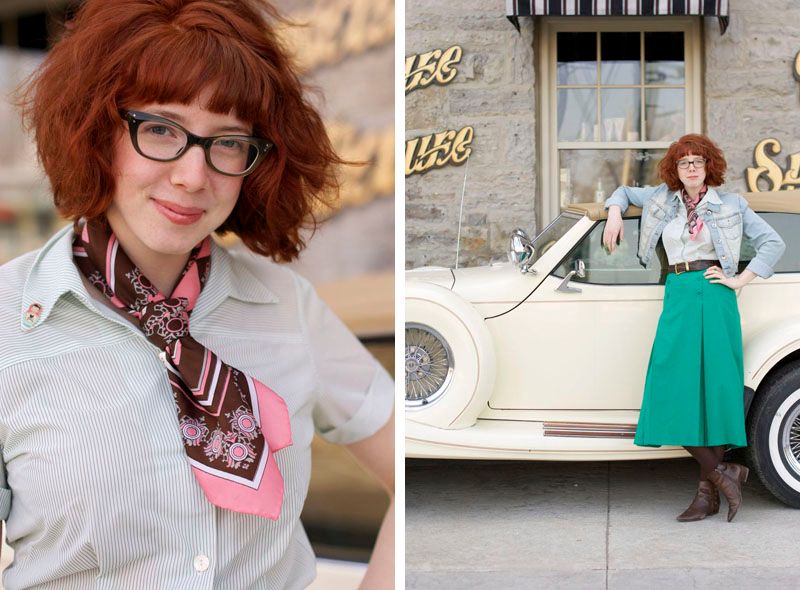
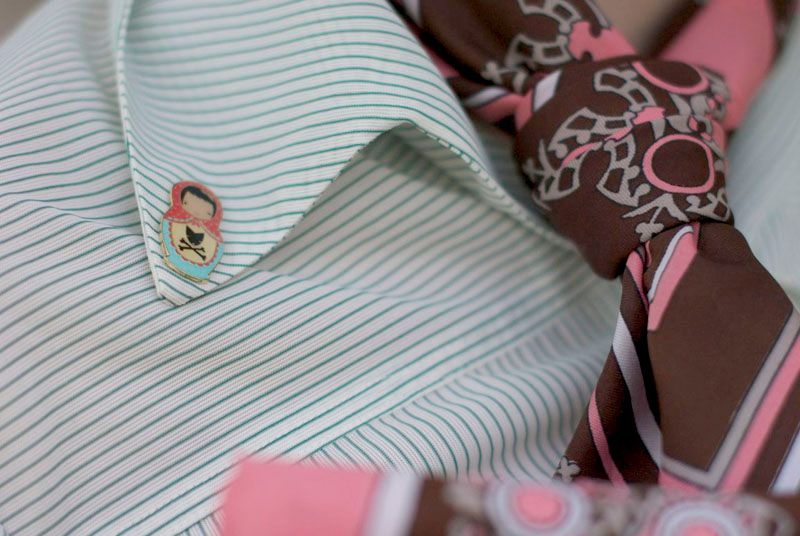
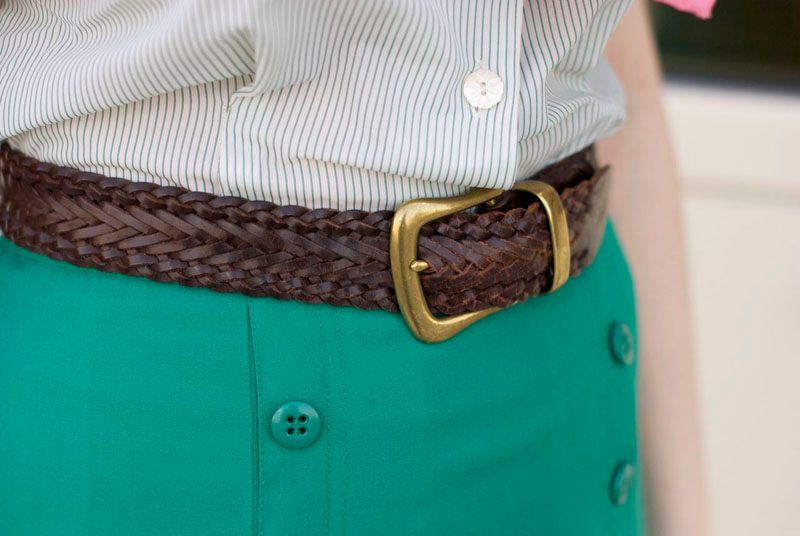
The skirt I'm wearing came from my grandmother. At first I wasn't so sure about the skirt, as the style of pleating and the (albeit faux) front buttoned flap is very 1910's; which, when it's a time period you typically work in, can get a little too costumey for my taste. Digging through my closet to find something to pair it with, I realized this 1960's top matches the colour perfectly, and happens to be just long enough to tuck into a high waisted skirt! it really was meant to be, I think! And wouldn't you know it, the folks at work quite liked how Shavian I look in this outfit.
THE DEETS
(hers)
Striped Shirt: Vintage, free from work
Cropped Denim Jacket: Charlotte Russe
Green Pleated Skirt: Vintage, inherited from my grandmother