

You've found an awesome bikini at the thrift store/garage sale/dumpster, and you feel awesome in it... or you would, if it weren't for the nagging knowledge of this bikini's former life.
When I picked up this amazing 1960's bikini at the Toronto Film Costume Sale last weekend (for $5!!! what up!) I could immediately hear my Mother making gagging noises in my head, just over the thought of wearing someone else's... well, underwear, basically! And yeah, it's true, that is pretty gross. So I said to Ephraim all excitedly that I was going to replace the gusset and this would be the best bathing suit ever!!
He said something to the effect of "Awesome! That all sounds great! But I don't know what a gusset is"
"It's the crotch. Well, the crotch lining. It's the clothing housing to lady bits, and should only really house one's lady bits. Soooo I'll make my own!"
So today, we're gonna sew a new gusset into our new(old) bikinis, and start anew! This project takes under an hour, can be completed by hand or machine, and is simple enough for any skill level. So, let's get to it, because temperatures are rising!

1// mark with a pin how high you want the rise of your gusset onto the bikini bottoms. It may be helpful to compare with a pair of panties that fit you well!

2// lay your bottoms on top of the fabric you will be using for the gusset. I used some lycra I had in my stash box. Pin the new fabric and bottoms together, and mark the new fabric along the leg holes, up to the rise you decided upon in step 1.
3// Carefully cut out the new fabric along your guides, and straight across the marked rise points at the front and back. I kept everything pinned together, because I couldn't easily see my marks on my dark fabric! Be careful not to nick the suit with your scissors, and go slowly!
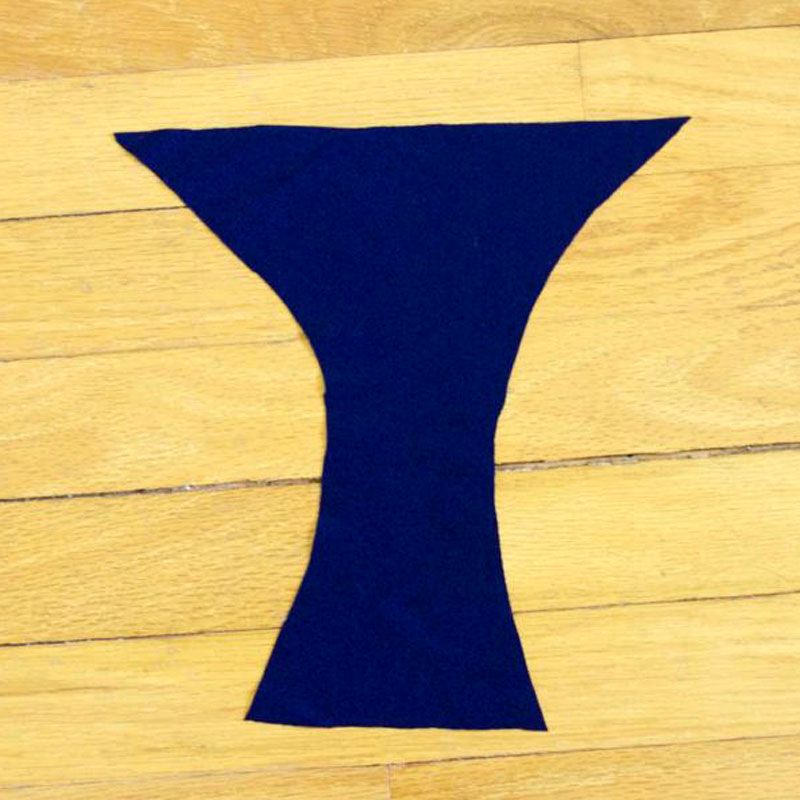
4// Isolate your new gusset material, and trim up the curved sides. This is a good time to try to get the cut edge nice and smooth, but don't worry too much; this is all about function and way less form!
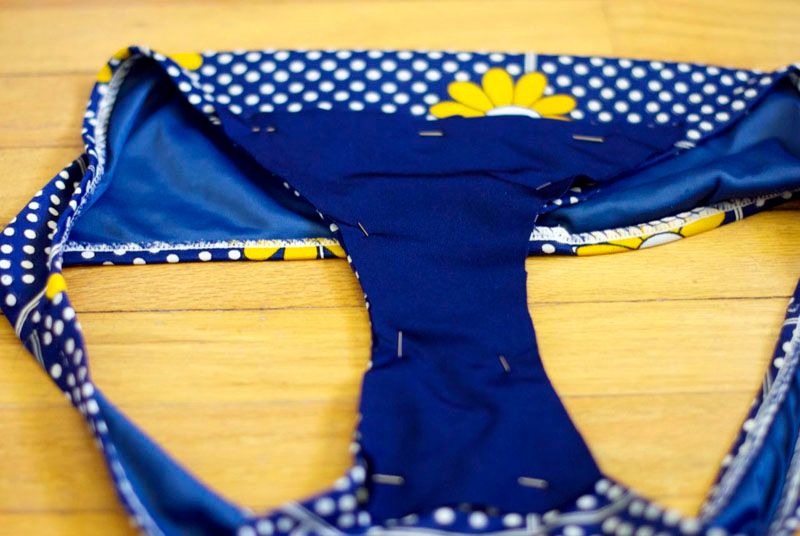
5// lay the new gusset into your suit bottoms. As you can see here, I trimmed my sides just enough to stop them from overlapping the edge of the suit, but tried to stay around where the suit was already sewn. It's not perfect, but that's okay!
6// Pin it within an inch of its life! The suit and in my case the gusset material as well were very slippery, and wanted to move around a lot. To avoid bunching and shifting as you sew, pin pin pin away. You will only sew the gusset in around the legs, and not across the tops.
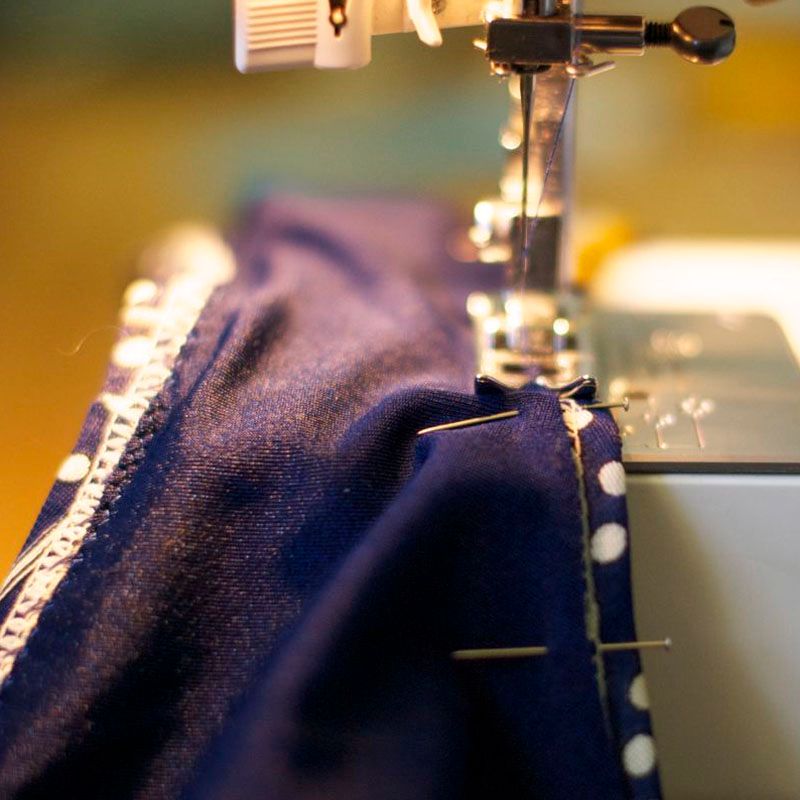
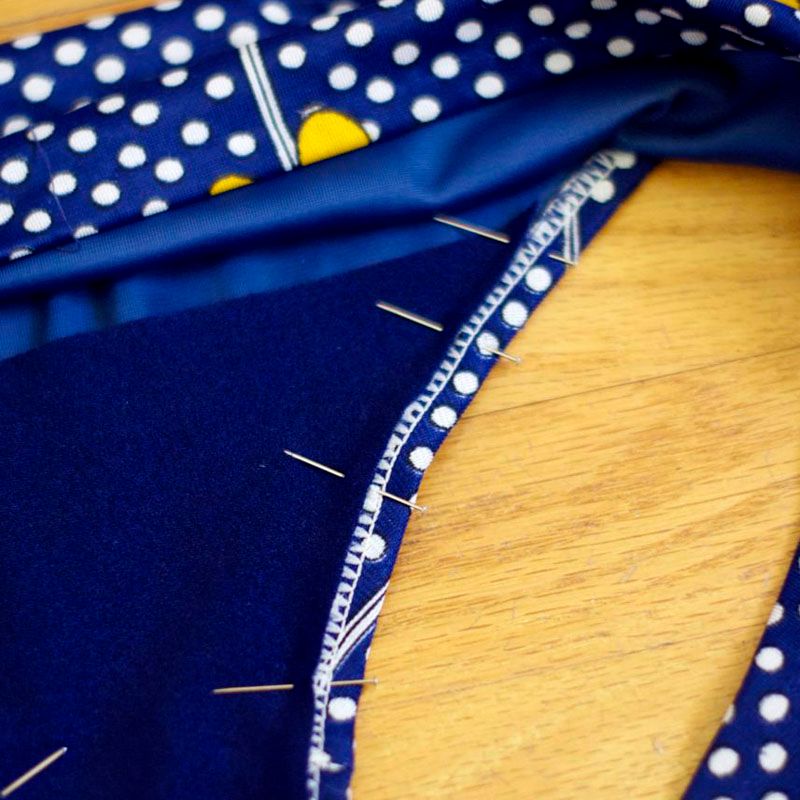
7// Sew the gusset into your suit with a short and narrow zig-zag stitch. You can also sew it in by hand with an angled top stitch, to allow the fabric a little give. Try and contain the edge of the fabric within your zig zag, to hold it down neatly. Optional: Hand tack the rise of the gusset in to the lining of the suit. It should lay nice and flat on its own, but you may want a more "clean" look.
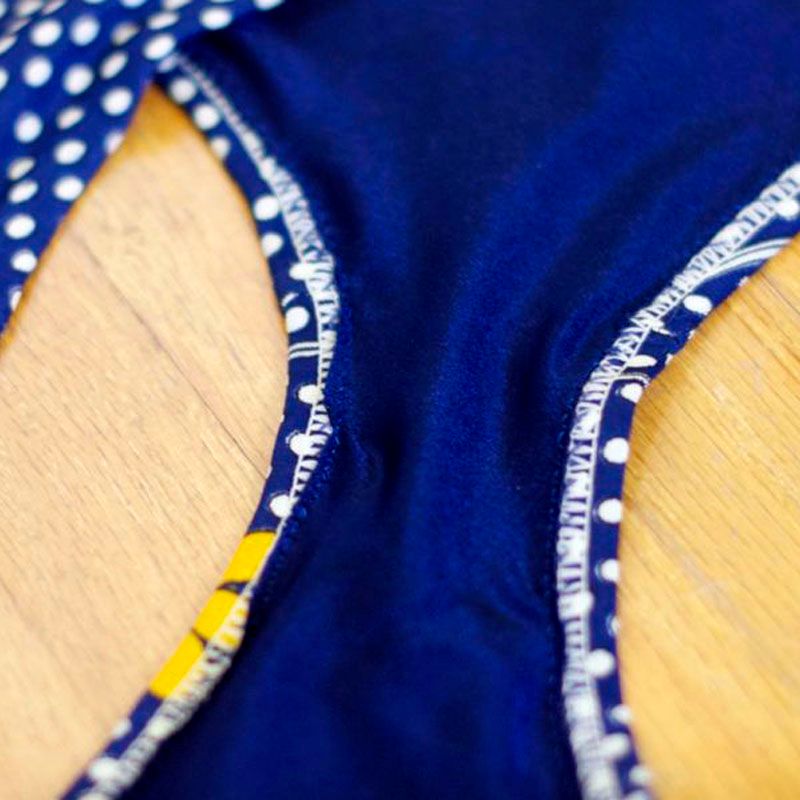
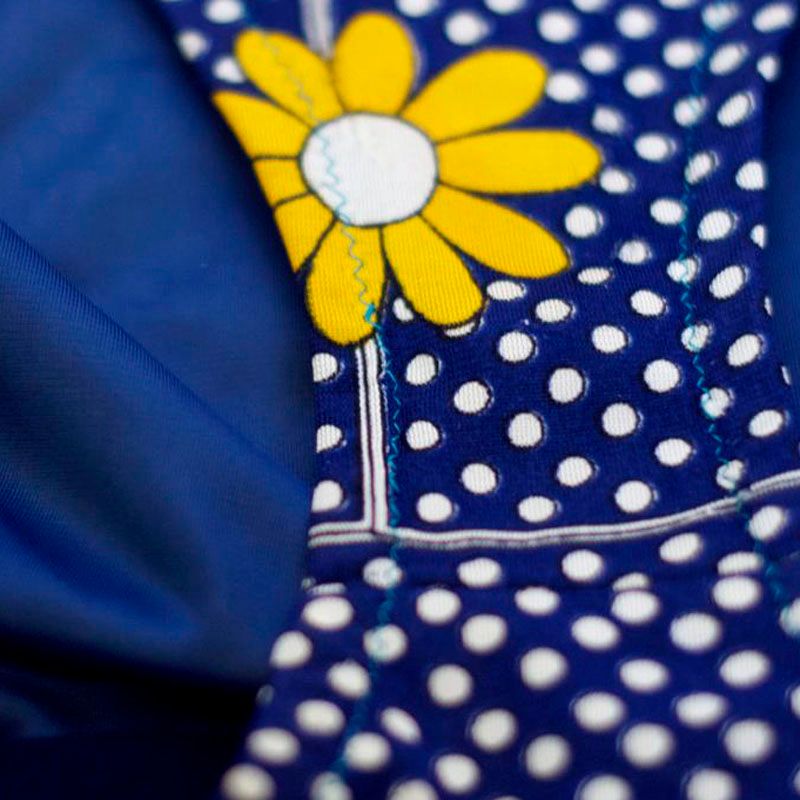
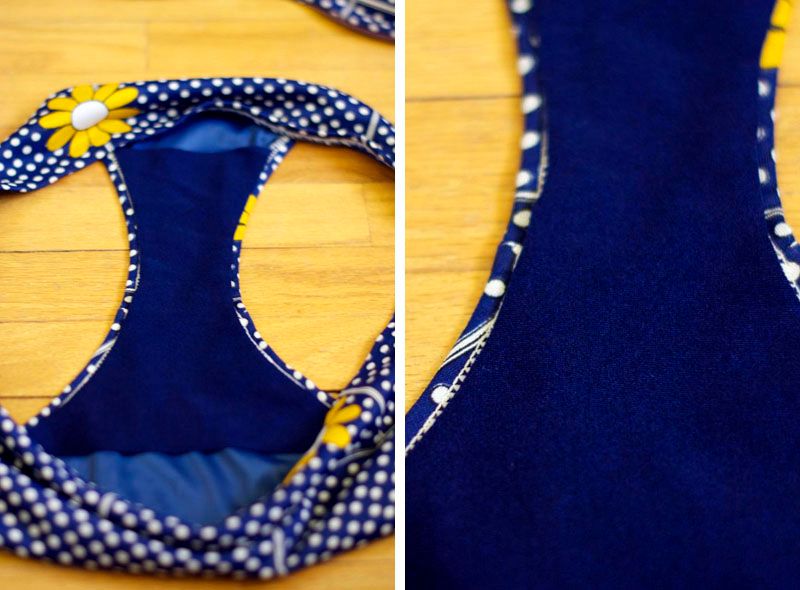
This is what your suit will look like after you've sewn the new gusset in. I used a contrasting bottom thread, because I liked the look of it. Or maybe it's because I didn't feel like loading a new bobbin. You'll never know (and I can guarantee you, nobody is going to notice!! Just keep it relatively close)
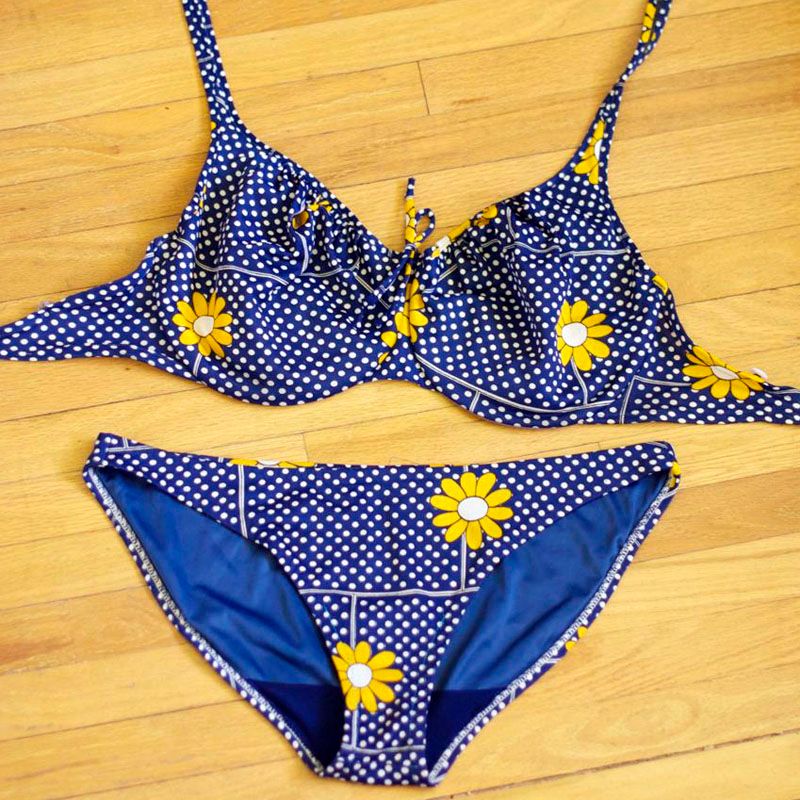
Now put that gorgeous suit on and get outside! Because it's really hot out, and so are you.
--Erin

Okay, first of all WHAT AN AMAZING SCORE! That bikini is perfection. Secondly, thank you for teaching me a better word for "crotch". Lastly- this tute is awesome because I always thought "hey that can't be too hard. But I don't feel like figuring it out right now...". Have fun rocking that vintage goodness this summer!
ReplyDeleteDude I freaked out when I found this bikini! It was originally being sold for $15, marked down to $5 for the show. For the wardrobe sale of the Canadian costumers guild, it had SO MANY vintage booths, including one by my favourite men's vintage store (where I have bought my glasses and sweet brown and black boots. Love that place!).
DeleteI totally thought the gusset was going to take longer than it did, but even with taking pictures every step of the way, I was done in an hour. And now my mother won't nag me/be incredibly grossed out :P.
Gusset is such a great word. It sounds like a kind of bird. The wild Gusset in its natural habitat...
A little effort put into a major score is time well spent.
ReplyDeleteVintagehoneybee.blogspot.com
I absolutely agree! Now if we would only start making adorable bikinis WITH UNDERWIRES (omg) I wouldn't have to get so giddy about finding things like this.
DeleteNah, I will always feel giddy about finding things like this!
--Erin
Thank you for this tip. I am a new to sewing, I've made a few dresses for my daughter, and wanted to try a bikini. I found a REALLY cute bikini pattern from the 1970s, but the pattern didn't mention a gusset, (also thanks for that word, "crotch" makes me wrinkle my nose). Thank you again!
Deletethis is such a wonderful idea! i love vintage suits, but yeah... the idea of them makes me a little squicky sometimes. perfect solution! x
ReplyDeleteThe mere fact that you recognized the gusset needed replacing before you would wear the bikini, tells me perhaps I had a hand in raising you right (although there was the initial gag-factor when I started reading your post, hahaha!). And it's nice to know you hear my voice in your head! L.M.
ReplyDeleteImpressive sewing skills!! I LOVE this idea so much I might just start telling people i do this to all my thrifted swimsuits so no one gives me that creepo look. super cute suit you found also!
ReplyDeleteMy blog: Cuddly Cacti
My E-Shop: Mitla Moda
This comment has been removed by the author.
ReplyDelete