If you're anything like me, you have more fabric and craft supplies than you actually have projects in mind. You see something that sparks your interest, and you have to bring it home and save it for a rainy day... and you seem to find such goodies faster than the rain seems to come. Fret not. We're going to take care of a little bit of that stash today. So, get your jars of buttons out (you know, the ones you snipped off sweaters long since donated) and let's get to it!
You will need:
- Buttons!
- Brass Tacks
- Contact Cement*
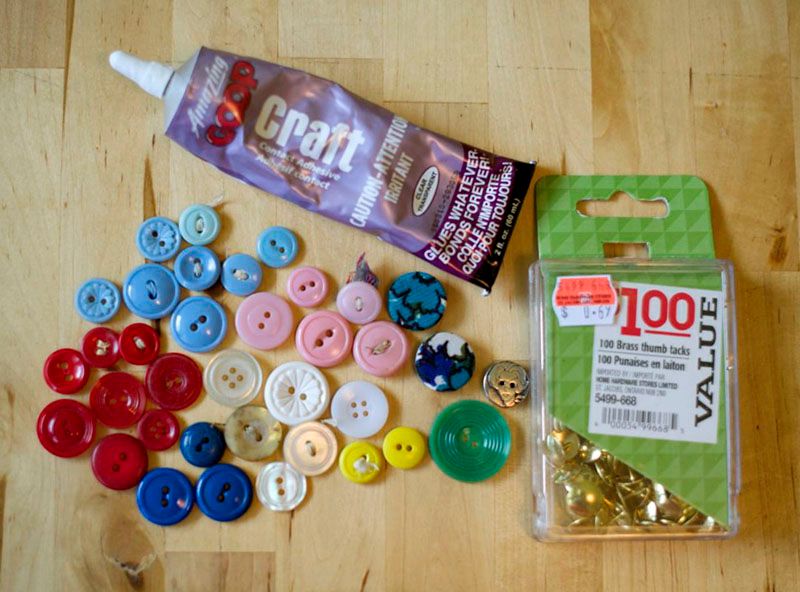 |
| * always read the warning labels on products. This contact cement has highly toxic fumes and should only be used with proper ventilation. Proper ventilation meaning use a respirator, or go outside! Safety first! |
 |
| Step One: Sort through your buttons! I had several jars worth, as a desk I recently bought had drawers full of sewing supplies |
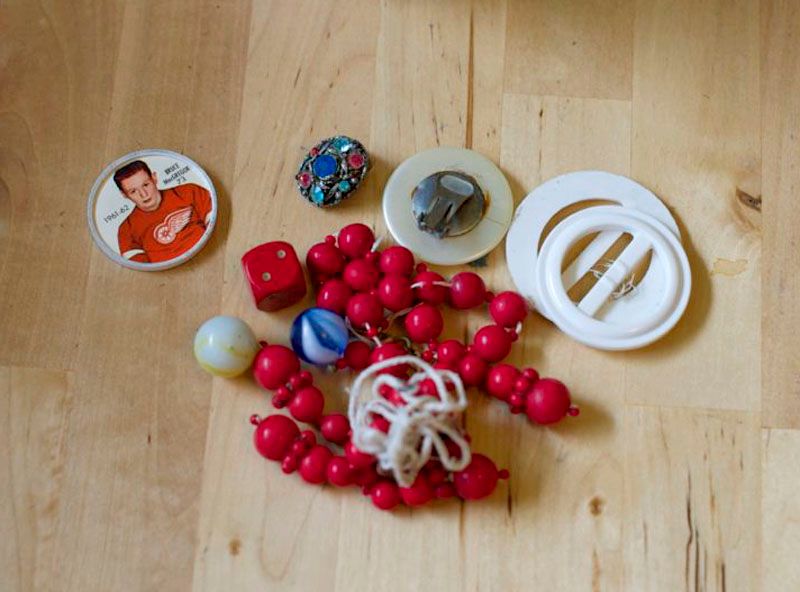 |
| This is a good time to sort out things that aren't buttons from your buttons! I found 2 marbles, 2 clip on earrings, 2 vintage belt buckles, 2 strings of beads, a die, and a human molar. Yeah. There was a tooth in there. And let me just say that somebody was not a diligent brusher! |
|
 |
| Set aside the buttons you will use as you go. I put any sets of 3 or more back into the jars, as they could still be useful for their normal function (and are super sweet buttons!). Optional: organize them by colour. Some of my buttons were grungy so I gave them a quick wash with some soap and water. |
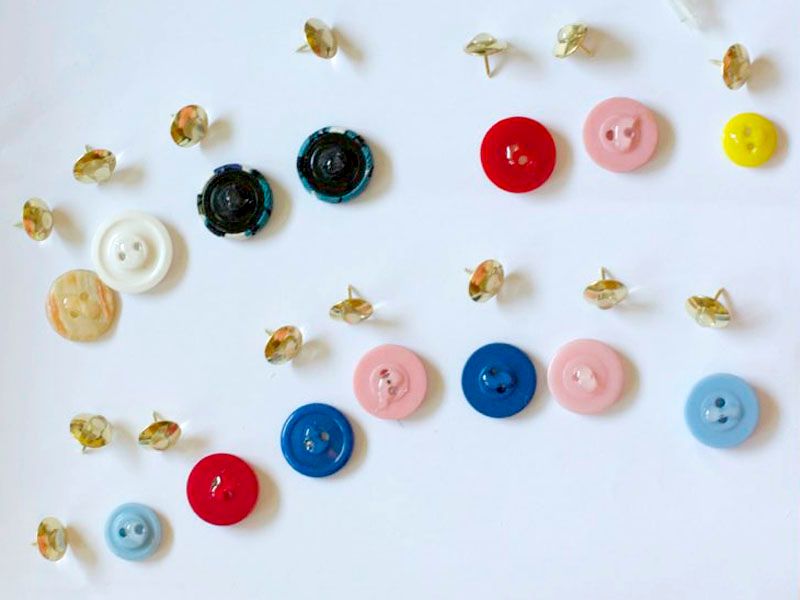 |
| Step Two: Put a bead of contact cement on the head of your pins, and the back of your buttons. Set each pair of tack and button aside as you glue them, but keep them close together so you know which tack had glue applied at the time of which button. Repeat for all buttons and tacks. Step Three: Wait until the cement has partially cured, usually 5-10 minutes. Your mileage may vary. | |
|
 |
| Step Four: Once the glue is partially cured, press the gluey sides of the button and tack together. Set them aside as you go. Repeat for all pairs of tacks and buttons. Step Five: Let glue completely cure for 24+ hours. Some glues take up to 72 hours to completely cure. Patience!! |
|
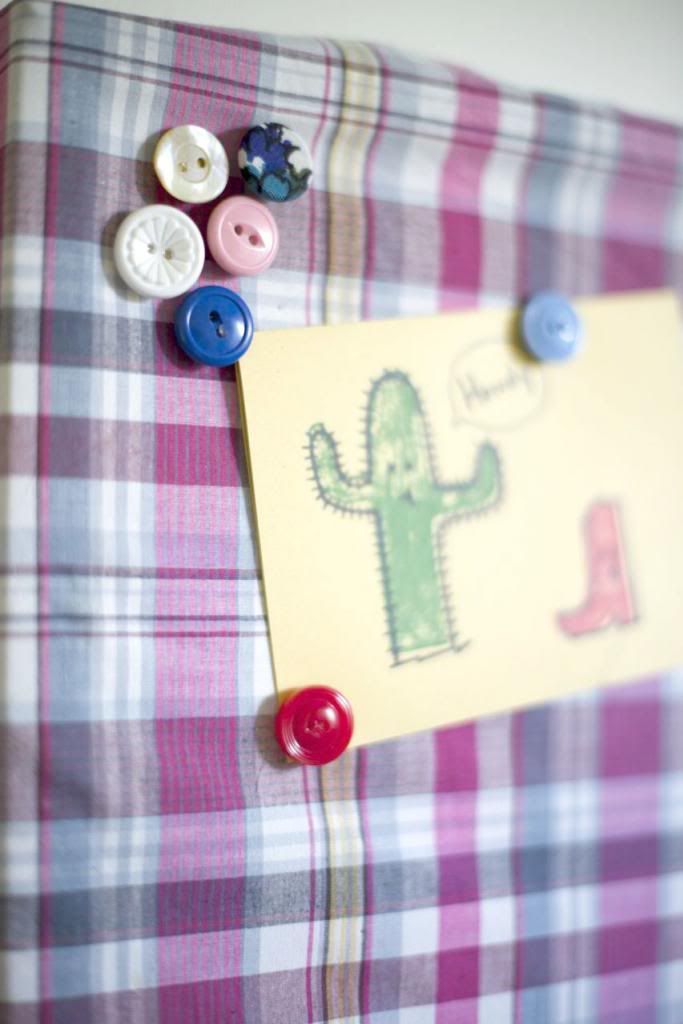 |
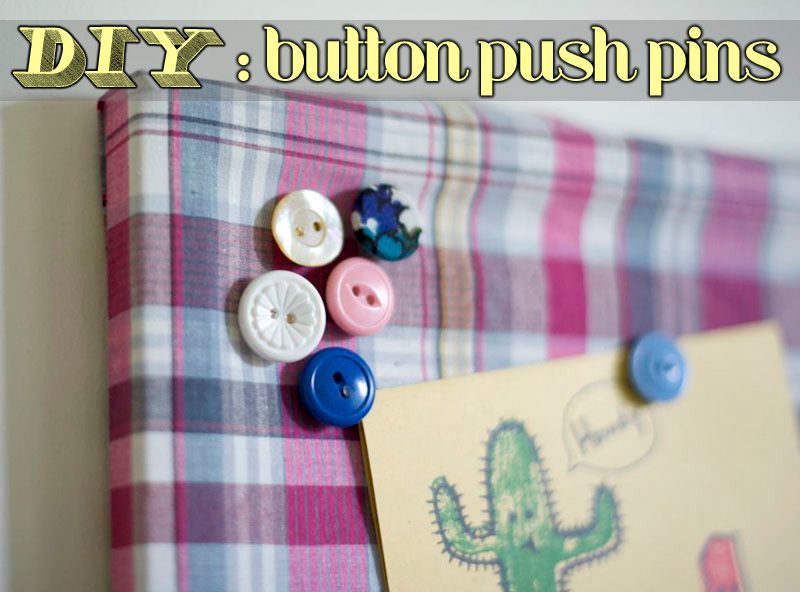
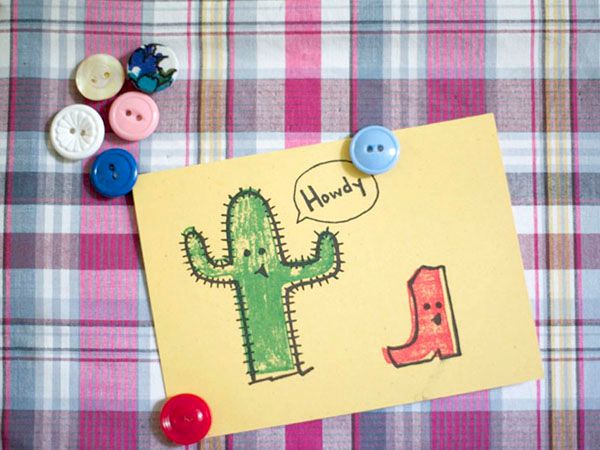
| Step Six: use your completed pins to hang reference materials, photos, cards from blog buds, whathaveyou! Enjoy the tactile Pinterest. It's awful pretty! |
There you have it! This project was inspired by a set of pink button tacks I found at Staples. For the $.69 it cost me to pick up some brass tacks, I busted a bunch of my craft button stash (I sorted out some things to donate!) and made use of old things I had laying around. Plus, these are WAY cuter than the $20 for 14 pins I found at the store! And that's a good thing.
--Erin


OMG! So happy you used my card :) YAYAYAYAYA
ReplyDeleteHow cute!
ReplyDelete