
Happy Sunday everybody!
I have today off as we can no longer run some tech elements at rehearsal today! It's a nice little surprise, and I can spend today working on some of my own things at home; and sleep. Yeah. Sleep and drink tea. Mmm.
Anyhow, while I'm waiting for my buddy Jamie to pick me up to head to IHOP for brunch deliciousness, I thought I'd compile all the progress shots of the floor cloth for the Directors Project into one post.
The Directors Projects (or DP for short) operates, basically, kind of like Fringe theatre productions. Basically, we have to stay as close to "neutral" with the physical space as possible, as both shows use the same theatre and only have a changeover time of about 20 minutes. When we first began this project, we thought about using a black floor, but soon decided that a wooden floor would be appropriate for both shows, and would help us define a playing space (the studio theatre is huge this year, it's a lot of empty space to fill!), and warm things up a bit.
It took a little while for the reality of this endeavor to really hit us, but it certainly hit us hard as we realized that our time was very tight, and we only had so many floor cloths or pieces of fabric large enough (38' across!! Huge!) to use for our floor treatment. as you can see in the photos below, we ended up painting over the sky portion of a backdrop of the Manhattan skyline. Waste not!
The floor cloth was painted over the course of about 4.5 days, and was painted by myself with some much appreciated volunteer help from the generous and understanding artistic team. Here are some progress photos and explanations of what we did.
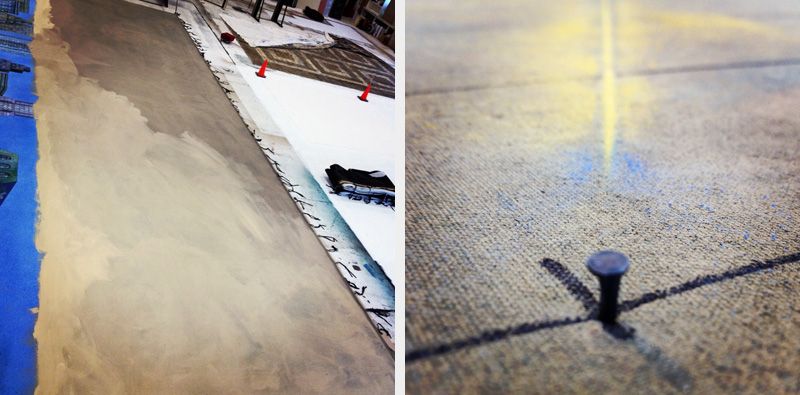 | |
| a patchy base coat / the chalked out angle of the edge of the floor boards |
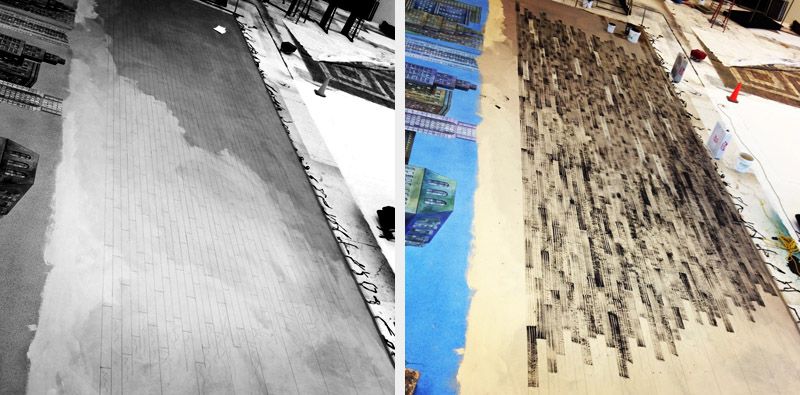 |
| Floor boards drawn in Sharpie / cut up wide brushes and dark brown paint create wood grain. Some boards repainted cream for consistency. |
 | ||
| We used a warm and cool brown in patches to achieve this look / all board lines drawn with "straight liners". 7' long 2"x4" with a handle. |
 |
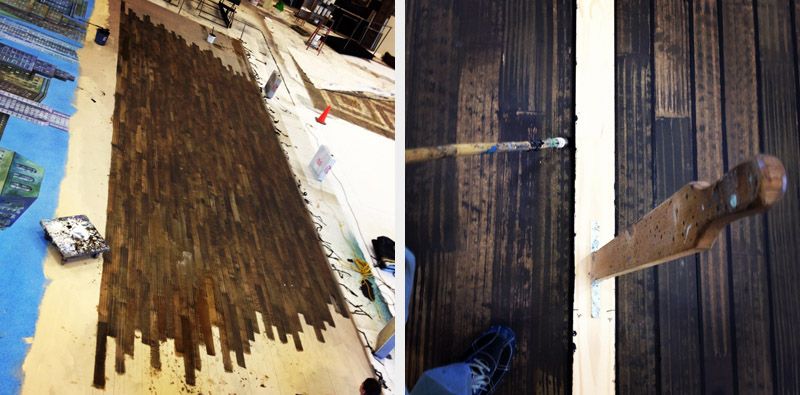
| Wood grain without and with brown wash. Wood grain strokes ran 3' (the board length) |
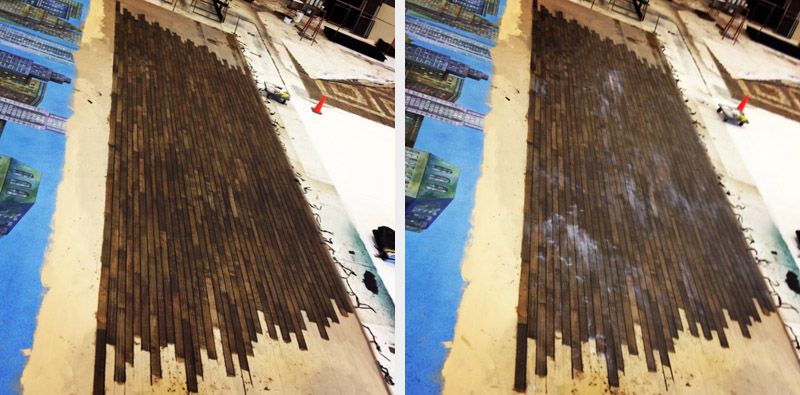 |
| Dark brown lines added between board lengths for depth / waxy glaze added for durability and sheen. Dries clear. |
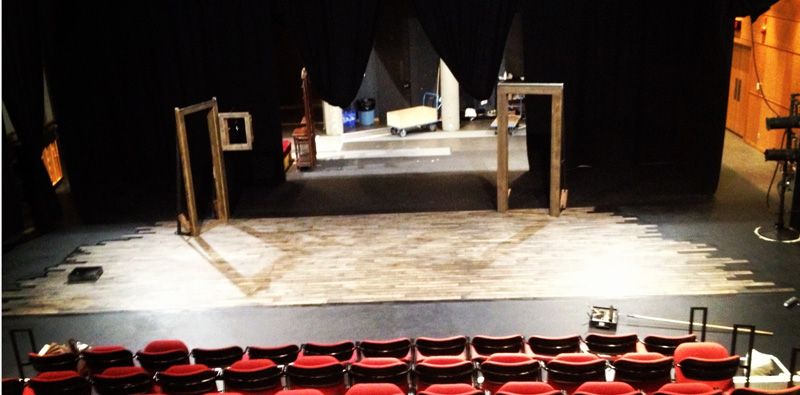 |
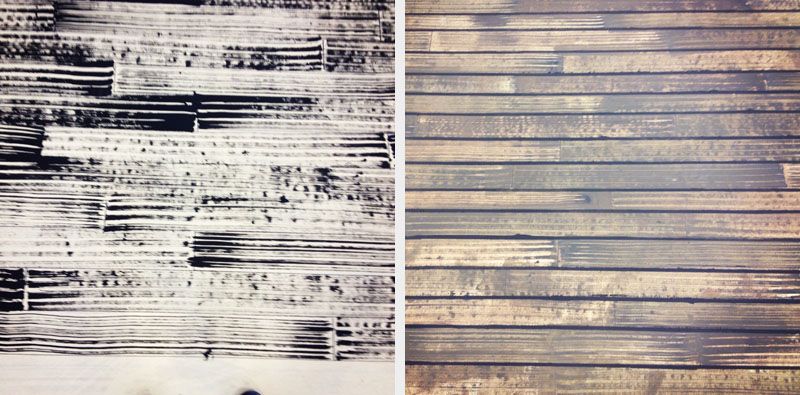
| Cut down, installed and with the edges of the boards blacked out. Work lights reflecting off the glaze, sorry! |
This was the first time I have ever painted a wooden floor, and I would
totally do it again, I am thrilled with the results! This could be a
neat way to finish a concrete floor!
--Erin

Argh! One of these days we three shall 'hop together. Good times.
ReplyDeleteAlso, excellent shots as usual! I've obviously heard a bunch about this process already but the pics really help actualize it.
Nice!
Sometime we all need to go! It was nice to hang out with Jamie and hear all about Japan. Such adventures! and he brought me back funny things including a green tea Kit Kat and a thimble :D
DeleteWow- it looks great, totally worth all your hard work! I wouldn't even known how to start a project like this :) Thanks for sharing the pics- it's cool to see the process evolve!
ReplyDeleteThanks Lisa! I have very little scenic painting experience, so I find it very exciting that ANYBODY can achieve these results. It's all about having the right tools, plus patience and good music.
Delete--Erin