

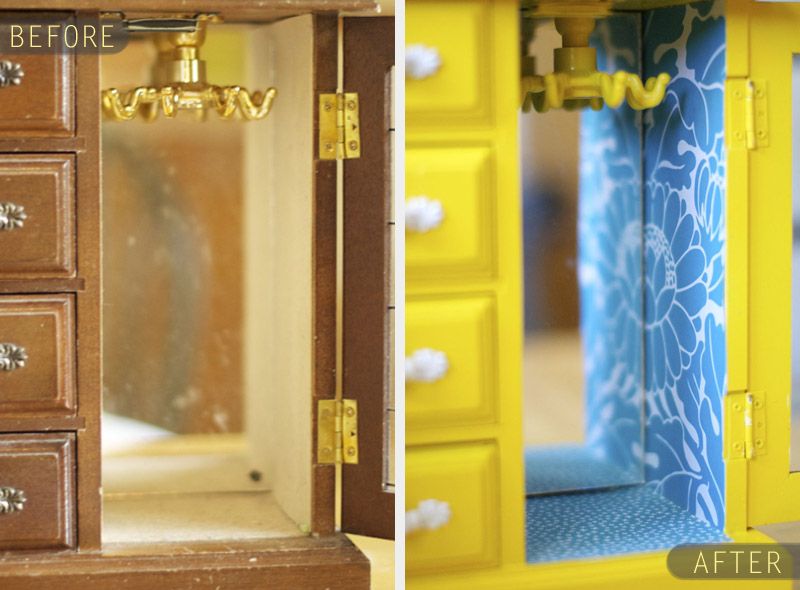
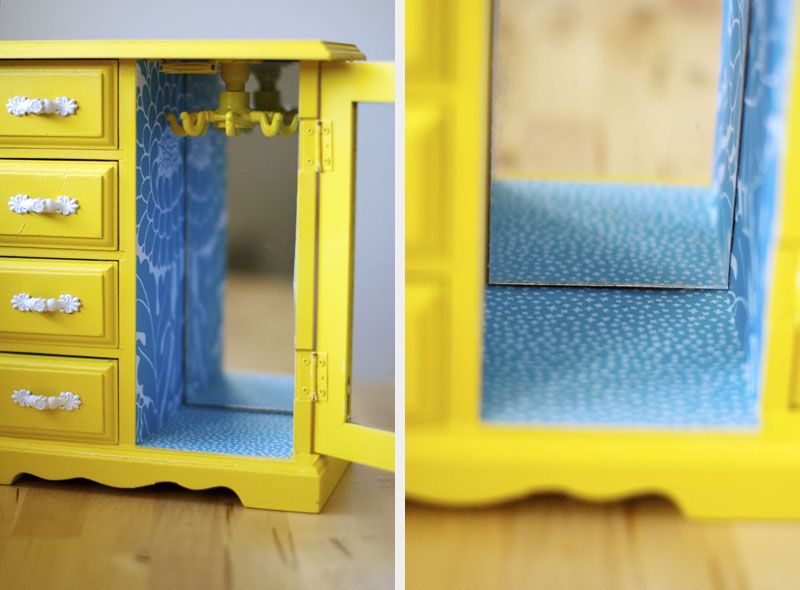
 Well, sadly the "stained glass" was no match for masking tape, so the one element I wanted to keep had to go. Now that all is said and done, however, I am glad that there isn't that stained glass busying up the front of the box, and instead keeps the busy visual interest to the contents! I have a bit of a yellow and blue thing going on in my room, which I wanted to be the colour scheme for the makeover. Michael's had a sale going on on their scrapbook paper, so I picked up a couple sheets for the liners and got a couple sheets to play around with, too. This was hands down the longest time I have ever spent in the scrapbooking section. Ephraim pointed out that blogging is just like online scrapbooking, which put me in my place somewhat. Though I don't put word stickers all over everything... "before" and "after" excluded, haha!
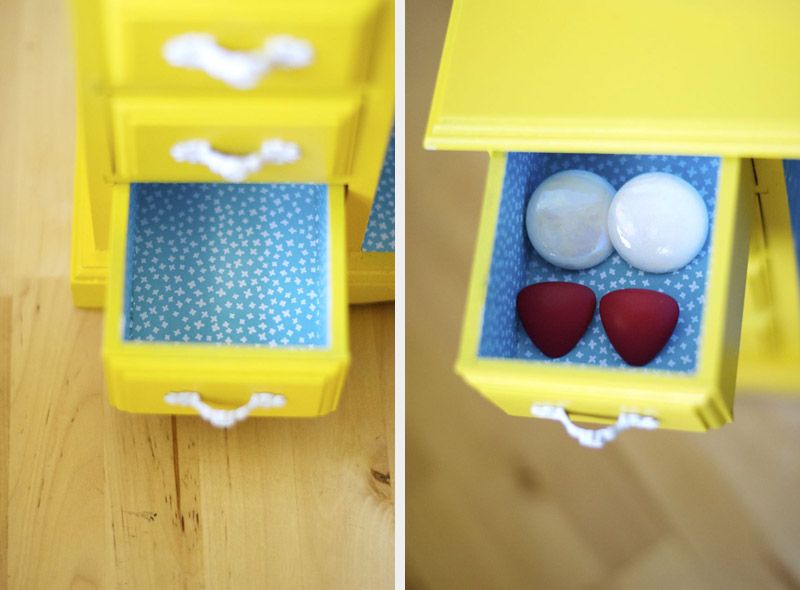
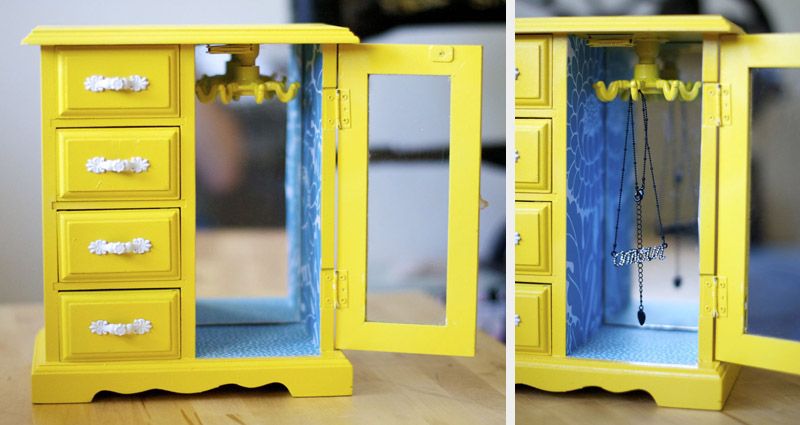
All in all this makeover cost me about $20, including the cost of the original jewelry box. Honestly, most of that cost went to the yellow spray paint (I had a leftover can of white from last hallowe'en!), and buying a new jar of rubber cement as mine had congealed a bit. I'm saying that this was definitely worth the time and money, especially now that I look back on these comparison shots! Now I have a perfect place to store my clip-on earrings, and some of my prettiest necklaces!
 |
| "Amour" just about sums it up! |
I'm so happy with how this project turned out! Are you giving any old items a much needed facelift?
--Erin

So kick-ass. You gots an eye for colour, darlin'.
ReplyDelete-E
That looks so cute! My mum has a jewellery box like this. Wonder what she'd say if I hijacked it and pimped it up!
ReplyDeleteBecky
xx
Thanks Becky! It's always neat to see how much a coat of paint can revitalize something!
Delete--Erin
Oh so sweet! Love the colour combo! I also feel like blogging is the perfect fire to light under one's ass and keep them busy, whatever the project, recipe or story may be :) Good work Chicklet!
ReplyDeleteThe colours make me so happy! I had no idea how many options I would be confronted with for the liners, it was hard to choose! And man, I have been loving having the motivation not to just collapse after work, and work on something for myself :)
Delete--Erin
Man! You made it looks GORGEOUS!
ReplyDeletexoxo mama wolf.
Thank you so much! Honestly, I could have done just about anything to that box and it would have improved it. Maybe even including setting it on fire. That bad boy was in sorry shape! I do so enjoy looking at it that much more, now!
DeleteHello there! This is awesome, my grandpa gave my daughter a jewelry box similar to this one, after seeing your post I think she may enjoy it more if I spruce it up a bit. Thanks for the inspiration :) Also, you are a lovely photographer!
ReplyDeleteKrystal, Newest follower via BBN
http://wildflowers3.blogspot.com/
Thanks so much Krystal! Photography is definitely the area in which I have seen the most personal improvement over the last few months!
DeleteOne piece of advice I can give for this is have a second opinion for the scrapbook paper if you go for a patterned inside! There were so many choices in the eye it made my head spin. Having someone else even as a sounding board helped a lot.
--Erin
This is amazing! I'm going to keep my eye out for a jewelry box like that!
ReplyDeleteHi Erin,
ReplyDeleteI am writing a blog for Goodwill that is highlighting donated treasures and creative upcycling. I really liked your project. I shared your before/after photo of your altered jewelry box. I wanted to give you credit for the project so I posted a link to your blog. Is that okay with you? Or do you have a preferred way of sharing, like a button? Thank you!
Susan
I'm so glad you enjoyed the project! My spiffed up jewelry box is one of my favourite makeovers I've ever done, and certainly helped me look at secondhand items with a bit more imagination. Thank you for linking back to the post!
Delete--Erin
Hi Erin,
ReplyDeleteYeah! I am glad I found you! I am new at editing the Goodwill Industries of Southwestern Michigan blog for our Treasure Chest. I will be focusing on vintage clothing, DIY, unique treasures and decorating with common donated items to Goodwill. I have your blog on my list to check frequently and will continue to link back when our "stars align". Here is the link to the blog http://treasurechest01.blogspot.com/
Thanks again!
Susan