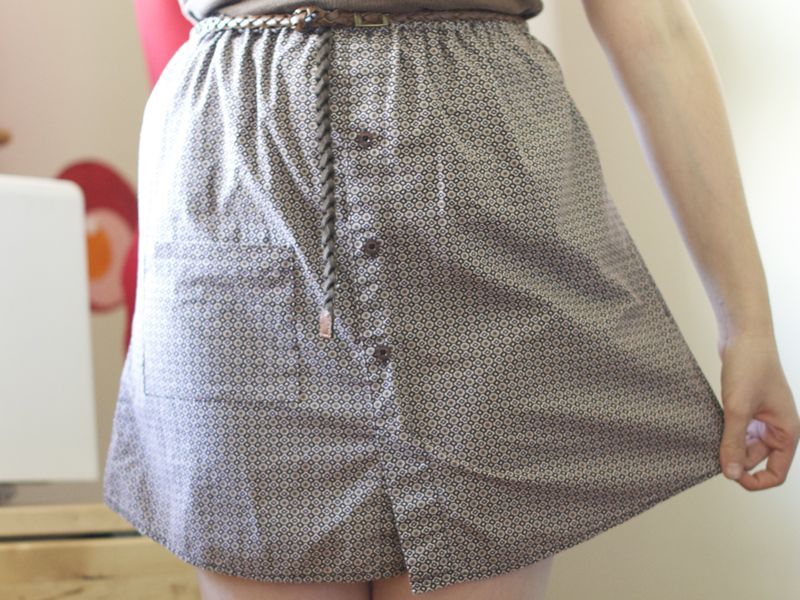
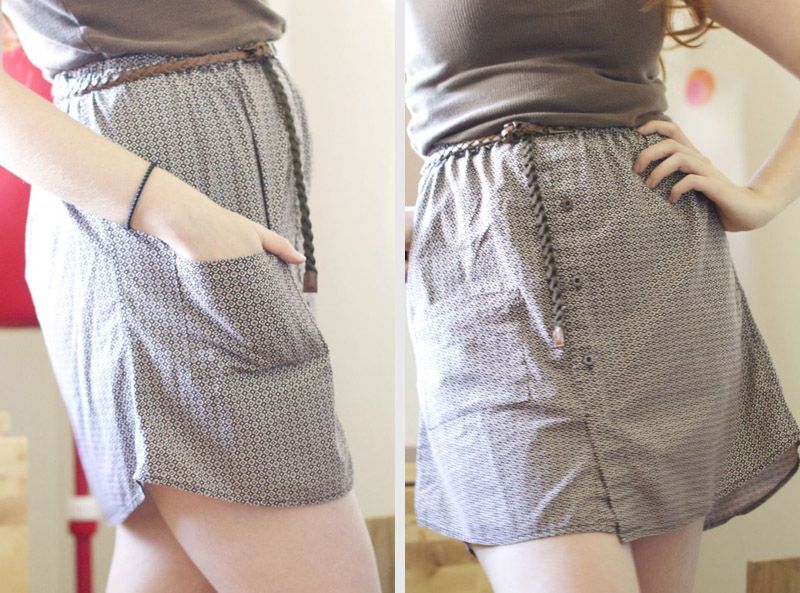
I have a ridiculously easy DIY to share with you today!
I found recently that I have tons of fabric laying around, without projects to their name. Likewise I had very few skirts in my closet, so I thought, why not solve both problems at once? So, I grabbed this shirt that was collateral damage from having to thrift for supplies for Ephraim's Christmas present with Ephraim (sneaky sneaky!) and made it into something useful!
1. Cut the shirt straight across the back and chest, just under the arms. This will be the skirt, basically! I used a men's large, and gathered the fullness into an elastic waistband for something easy and comfortable that would look flattering worn at the waist, or below the waist.
2. Sew up the front of the shirt. Button all the buttons that remain, and sew up either side of the placket that the buttons are on, so that the skirt is one full piece. I left about 3 inches at the bottom open for ease of movement.
3. Remove one of the sleeves. Cut of the cuff, and open the sleeve up to a flat piece of cloth by cutting open the seam.
4. Cut the waistband from the sleeve. I cut 3 strips 2 1/2" wide, the full length of the sleeve. I then sewed these 3 pieces together to make one long strip, which the then trimmed down to make it 1" longer than the opening at the top of the skirt.
**My waistband used 1" elastic, hence the width. Make your waistband 2 1/2 times the width of whatever elastic you use! I recommend 1" and larger.**
5. Iron the waistband in half width wise, so that you have a long strip doubled over, 1 1/4" wide.
6. Sew one long side of the waistband to the skirt. Press the seam so the allowance will end up inside of the waistband. Then, press 1/4" from the un-sewn side in, so that this will also be captured within the waistband. Top stitch this new pressed edge from the inside. Don't worry if the stitching line on the outside isn't perfect, once it's all gathered into a waistband you won't be able to tell (so long as you use coordinated thread!)
7. Feed your elastic through the waistband casing. I cut my elastic so that it would stretch a little bit to my waist size, but could easily stretch over my hips. I also like to attach a safety pin to the end of the elastic I am feeding through, I find it makes things go a bit smoother.
8. Sew the elastic together once both ends are now sticking out of the little slit int he casing (which you should keep at centre back so it's always easy to find). Make sure you're happy with your elastic, and then whip stitch the slit in the waistband shut.
9. optional Stretch the front of the skirt waistband and stitch through the middle of the elastic, all the way across the front. Don't forget to secure your stitches where you begin and end. I found this made the front gathers a bit flatter, and left more of the volume to the back of the skirt. I found this more flattering for my shape, but it isn't necessary!
10. optional Create a pocket from the fabric of the other sleeve. Stitch on wherever you please! I can't live without pockets, so this was a must-have for me!
 |
| A better shot of the fun fabric I used. It's brown and purple, but photographed quite grey in that light! |
I love my new skirt! It's comfortable and light for the heat, plus it's easy to coordinate with a tank top for just running about town. Besides all that, it's made something useful out of something that was just taking up space in my closet. Bonus!!
Definitely leave a link in the comments if you're itching for a simple summer DIY of your own, I'd love to see your button up skirts!


I love this! Your directions make it seem simple so I'm going to have to try it! I've made an elastic waistband skirt before so I think I can do it... :)
ReplyDeleteLisa, the skirt is so simple, I'm actually a little embarrassed it took me so long! I really needed the motivation of knowing it was something I could make and wear all in the same day, to finally get my butt in gear and cut up that shirt! Plus, the whole shebang cost about $3. Sweet.
DeleteDefinitely shoot me a link if you end up making one (and you should!)
--Erin
I have tried something like this before and it did NOT turn out this nice! I'll have to try your pattern! It's so cute :)
ReplyDeleteHey Heidi! I found that the secret to the shirt falling nicely as a skirt was keeping my cutting lines really really straight, and sewing up the front placket before putting on the waistband. I just buttoned it up to hold it in place.
DeleteGood luck! I'd love to see how it turns out!
--Erin
That's so cute and super clever! I always see shirts in charity shops that have great prints. Now I'll be able to turn them into skirts. Woohoo!
ReplyDeleteBecky
xx
http://www.beckybedbug.com
Hi Becky,
DeleteYou should definitely give the DIY a try! Especially to make use of those thrift store shirts that have a pattern that is maybe a little too crazy to be that close to the face! I am very often drawn to things that cast ghastly colours on my pale skin, but this way, I seldom have to turn them down :P (and thus my closet grows...)
Thanks for stopping by!
--Erin